

Tuesday, November 12, 2013
AUTHENTIQUE PAPER: Traditional Holiday Stockings
Head on over to the Authentique Blog to see this wonderful tutorial using Authentique's Tradition Collection and some wonderful Petaloo products! There's even a chance to win some great Authentique papers!! You'll even see me break out the Xyron Creative Station on this one!
 Pin It


Thursday, October 31, 2013

Tuesday, October 29, 2013
Blog Swap Week with Xyron + Maya Road!!

The first project that I created, was a sweet little ornament using one of the Maya Road Vintage Metal Heart Tins.


I waited to create a hole for the cording until I glued in the heart down. This way, I didn't have to match anything up. Because of the metal, I used my Crop-o-Dile for this.


Xyron: 9" Creative Station, 3" Sticker Maker, Mega Runner, Foam Squares
Maya Road: Vintage Metal Heart Tart Tins, 5 Ring Tab Book, Twine Cording (Cherry Red), Photo Frames Chipboard Set
Monday, October 28, 2013
You Are One in a Million... (Gossamer Blue September 2013 kit)
I really loved this layout. I saw something similar on the TwoPeas board... Or maybe Pinterest. Anyway, I found a similar cut file in the Silhouette Online Store and had fun mixing and matching the papers. I was in the mood to just create, so this is a pretty direct translation. And I still love it.
 Pin It
 Pin It
Sunday, October 27, 2013
Little Dancer (Gossamer Blue September 2013 Kit)
This past June, my oldest got to dance in her first ballet recital. Every other year, the local YMCA dance classes rent out this beautifully large theater downtown and they all perform. Miss I's first year in ballet was just this such year. She got to wear a wonderfully lovely yellow dress and dance to The Beatles' "Here Comes the Sun". Being a huge Beatles fan, I was in love that she now knows all the words to such a beautiful song.
 For this layout, I used all of the lovely pieces from Gossamer Blue's September kit. I just loved that arrow stamp, and repeated it a few
times. I also added a My Mind's Eye puffy geotag, and a Fancy Pants cork
arrow.
For this layout, I used all of the lovely pieces from Gossamer Blue's September kit. I just loved that arrow stamp, and repeated it a few
times. I also added a My Mind's Eye puffy geotag, and a Fancy Pants cork
arrow.
Pin It

Pin It
Thursday, October 17, 2013
AUTHENTIQUE PAPER: Cards & Tags with Core'dinations
I really enjoyed making this set of tags for the Authentique Blog today. Make sure that you check out all of the wonderful details that come about by combining Authentique papers and Core'dinations cardstock!

Pin It

Pin It
Wednesday, October 16, 2013
Crop Layouts: ScrapbookSteals Crop (September 2013)
I always feel that I don't create enough when I'm at a crop. Mainly I love to chat with my lovely friends who are there with me. This last ScrapbookSteals Crop was no exception. I did however get a few things done during the classes, and in true Heather style, didn't follow directions all that well.
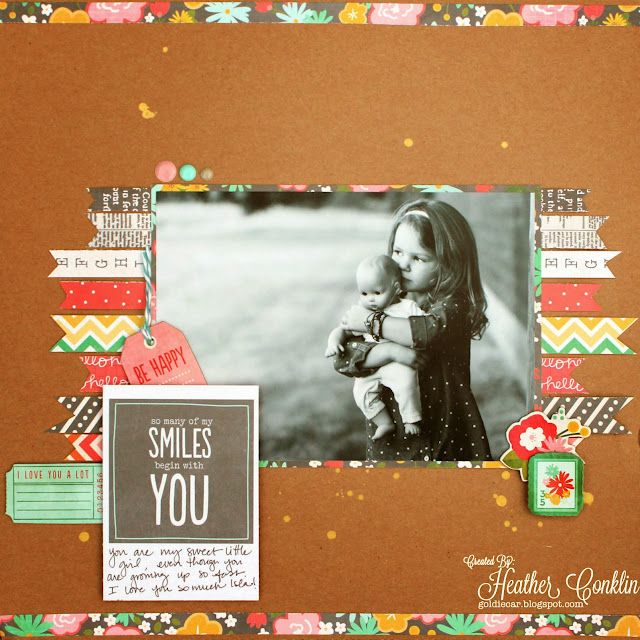
The first layout is using Pebbles' From Me to You papers. The class used the Dark Kraft cards from American Crafts, as a card making course. I really liked the cards, but wasn't really in the mood for cards that morning. Instead, I created this fun layout using most of the patterns and pricing strips from the various papers. I really liked the grey from this set of papers. I also really liked this sheet of paper, and am looking forward to using the rest for a few cards.
The second layout used a page kit from Echo Park's Reflections Collection. I swapped the order of the layout that was presented, and added a few more details with the white pen.

For this layout, I'm not quite sure if I'm done with it so far. KC from My Mind's Eye challenged us to a few choices of layouts. One, we had to use Christmas papers in a non-Christmas way. And two, he gave us a few choices for our layout. Luckily, I had this adorable picture of my little Seahawks fans ready to scrap. The papers are all from The Winter Wonderland Collection. So is the twine. Which actually worked perfectly as they are pretty close to Seahawks colors. The alphas are Pink Paislee and October Afternoon from my stash, the stamp from Elle's Studio for Gossamer Blue.

Pin It
The first layout is using Pebbles' From Me to You papers. The class used the Dark Kraft cards from American Crafts, as a card making course. I really liked the cards, but wasn't really in the mood for cards that morning. Instead, I created this fun layout using most of the patterns and pricing strips from the various papers. I really liked the grey from this set of papers. I also really liked this sheet of paper, and am looking forward to using the rest for a few cards.

The second layout used a page kit from Echo Park's Reflections Collection. I swapped the order of the layout that was presented, and added a few more details with the white pen.

For this layout, I'm not quite sure if I'm done with it so far. KC from My Mind's Eye challenged us to a few choices of layouts. One, we had to use Christmas papers in a non-Christmas way. And two, he gave us a few choices for our layout. Luckily, I had this adorable picture of my little Seahawks fans ready to scrap. The papers are all from The Winter Wonderland Collection. So is the twine. Which actually worked perfectly as they are pretty close to Seahawks colors. The alphas are Pink Paislee and October Afternoon from my stash, the stamp from Elle's Studio for Gossamer Blue.

Pin It
Subscribe to:
Posts (Atom)