Showing posts with label wreath. Show all posts

Friday, February 14, 2020

AUTHENTIQUE PAPER: Valentine's Day Love Notes Wreath


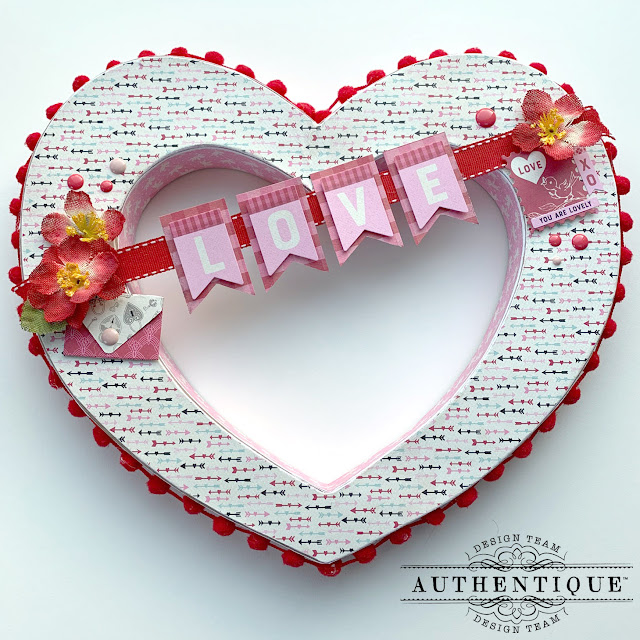
This wreath began as simply a fun paper mache base that I purchased at a craft store. I glued and trimmed papers (Two & Three) from the Love Notes collection to the base, sanding edges to perfectly match the shape.
Once the paper covered the front, inside and outside of the heart-shaped wreath, I hot glued the pom pom ribbon in place.
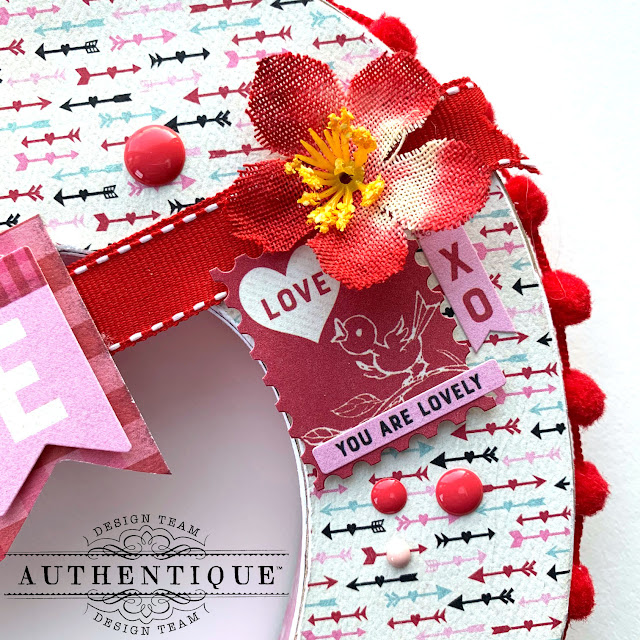
Took the sticker banner from the Details sticker sheet and used dimensional adhesive to layer the stickers onto slightly larger banner pieces (I just used the sticker as a guide). Once those were complete, I hot glued those pieces to the ribbon banner, and glued that in place on the edges of the wreath.
I added a few die cuts, a couple of Details stickers, and some extra embellishments from my stash, and the wreath was complete.


Thanks for spending Valentine's with us this week. ~ Heather 

Pin It

Friday, August 3, 2018

AUTHENTIQUE PAPER: A Fall Wreath with a Sneak Peek of the Pleasant Collection!

I love Fall. I love when the air turns crisp, the leaves start to fall, and the promise of cooler weather comes about. However, it's firmly August, and summer is here for now. I can wish just a little bit, and play with Authentique Paper's newest collection, Pleasant. I knew when I saw this collection, I needed to make a new Autumn wreath.

I started with a heart-shaped wreath from Michaels. I loved the simplicity of the grapevine wreath, and didn't want to overwhelm the organic nature of it with too much. This is why I chose the Silhouette cut shapes I did, as they allowed for some sense of the wreath underneath them.
I started with a heaver base of three flowers (Pleasant Six, Seven, Eight) using the same rolled flower design. Once those were glued together, I added the leaves so that the flowers would sit on top of them. Each of the leaves is glued at the stem, then once or twice towards the top of the leaf.
The flowers all use the same Silhouette cut file. Just by altering the color of your paper, and how you roll the edges, each flower can look slightly different. I also added gems inside each of the flowers. 
I loved all of the tone on tone colors that each of the flowers had. The subtle look was effective. I also added a simple bow under the flowers to pull together the blue in the patterned paper.

For the opposite corner of the wreath, I started with a few more of the same leaf cut files in some of the warm toned papers of Pleasant. I added a die cut from the Elements sheet, which I used dimensional adhesive to pop it up a bit.
 To mirror the other side, I added in another little ribbon bit and some gems.
Lastly, I used a large loop of burlap ribbon to create a slipknot and give some extra for hanging. The wreath is complete, and ready for the turn in the weather. I hope you're ready to see more of our Pleasant Collection!


Supplies Used:
Pin It

Monday, September 22, 2014

AUTHENTIQUE PAPER: Authentique Paper, May Arts, Imagine Crafts Blog Hop- Create a Fall Wreath with "Harmony

Good Morning!! Check out the Authentique Blog, as we are excited to share our projects also using products made by ImagineCrafts and May Arts. Today, I am sharing a fun Fall wreath using Harmony Collection by Authentique, three May Arts ribbons and my favorite ImagineCrafts Memento Ink. I even have a fun mini-tutorial on the great ribbon flowers!
Be sure to check the Authentique Blog every day this week for more project inspiration! We have an Authentique Prize Pack as well as prizes from May Arts Ribbon & Imagine Crafts to give away to a couple of our lucky commenters on the original blog post.

For another chance to win, make sure you follow us on Instagram @authentiquepaper 

Also, make sure you stop and visit us as well as our friends over at May Arts Ribbon & Imagine Crafts on facebook for prizes and lots of wonderful inspiration coming your way!

Supplies:
 Authentique Harmony Collection: Abundance & Awakening 12x12 Papers, 6x6 Bundle
Additional Supplies: wreath, brad, Xyron 1.5" Sticker Maker, liquid glue, wire, Epiphany Craft's Shape Studio Round 25 tool and epoxy stickers, Kiwi Lane Designer Templates (Scallops)
Pin It

Tuesday, March 11, 2014

AUTHENTIQUE PAPER: A Spring Wreath with "Flourish"

Make sure that you check out today's Authentique Paper blog post today!! I'm welcoming Spring with this beautiful wreath that uses the amazing Flourish Collection.

I just LOVE all of the elements!

Pin It

Friday, November 25, 2011

AUTHENIQUE PAPER: Putting a Bird on Free Bird

From the Authentique Blog:
 *****
Hello folks!! Heather here. I hope that all of your Thanksgiving feasts were wonderful, and that you were able to spend time with loved ones. Today for you, I have a nifty piece of decor that you too could whip up before the holidays! 

Samantha showed me a fantastic pin over at Pinterest, and I was inspired to use the Free Bird Series to craft something similar. I even drew a lovely little chickadee to place on it! 
I chose to use Warmth for the wreath, as I felt that it reminded me of all of winter. It does have some lovely colors and patterns.
I didn't have a little chickadee, so I actually drew one up using my scrapbooking pens and a little bit of chalk ink. Yup... the yellow is chalk ink!
The wreath itself is simply concentric circles of cones of paper. I just cut the Free Bird pages in half using decorative scissors, then trimmed off one of the 3" sides with decorative scissors as well. Roll the paper into cones, then attach the trimmed edge to the cone with a glue dot.
To attach the cones to the wreath, each cone is pinned in place, then hot glued. I haven't quite made up my mind whether or not I want to replace the drawing with a little faux bird or not yet. At the moment, I rather like him.
I hope that you enjoyed my take on a fun decor project. Just another way to use those fantastic Free Bird papers!! Have a great start to the holiday season!!

Supplies Used: 
Authentique Free Bird Series: Warmth FBS 129, 130, 131 & 132
Additional Supplies: wreath form, American Crafts Memory Markers in Charcoal and Black, AC ribbon, AC white cardstock, Colorbox Chalk ink in Yellow Cadmium, stick
Pin It

Wednesday, August 10, 2011

How To: Yarn Wreath (Part 3: Decorating!!!)

Here is the final version of my yarn wreath! I love this, and am planning on gifting it next month! For this project, I wanted to use some of the papers from Authentique.
Here are the rest of the directions on how to complete this project.

Side note... I dropped the wrapped wreath this morning and the seam busted open. So, I had to glue it, fix the yarn, then wrap this wide ribbon around the wreath's seam to cover up my accident. No one will ever know!!

Step 1: You can cover the seam of the wreath with a wide ribbon (totally by choice, but it does add that extra something!)
Step 2: Pin the ribbon using fabric pins. Don't spend lots of money on these, those gorgeous stick pins are too expensive for something that is not going to be seen.
Step 3: Stick on of your flowers where you want to add it, I used a combination of stick pins, and hot glue to make it stay in place.
See my hot glue. Again... It's in the back. No one will know :)
Step 4: Add more flowers, bling them if you want more sparkle! I attached a Theresa Collins (thanks swap buddy!) gem to the center of a flower.
Step 5: Make smaller flowers!! I just used a couple of strips of paper (about 1/2") to add smaller flowers. Take the strip...
...and crumple it up! The more damage you can do to the paper fibers, the better!! Rips don't really matter either, they will just help to give the flower more detail.
Step 6: Fold the strip of paper in half lengthwise, perfection is NOT your friend in this!
Step 7: Wrap up the "rose", leaving some extra paper to finish the flower. Then use a glue dot at the bottom to stick the extra paper to the bottom! Cut it when you are done.
Here is what the front looks like.
And the back with the extra cut off!
Step 8: Use another stick pin, in a color that matches, or contrasts, the paper flowers. I chose pink, as there are small bits of bright pink color in the Authentique Blissful papers!
Step 9: Make more flowers, use buttons, brads, stick pins, etc. to add more definition, color and interest. Stick pins just stick into the foam. I used glue dots to attach the threaded buttons (the thread just finishes them off). Brads are super simple... Just make sure that the tines of the brad are together... And try to slip them between yarn pieces.
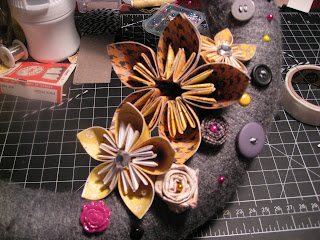
Step 10: I know that the majority of the items are located on one side of the wreath... Create a visual triangle (which makes the eye travel back and forth through your work) by adding a few pieces of interest in a different part of the wreath.
Step 11: To hang the wreath, I hot glued a circle of thinner ribbon on to itself. I used another stick pin to make the ribbon stay in one place. Again... Color doesn't matter since you won't see it!
Final version!!
Closeups of the wreath.
And the visual triangle!
See how the small amount of detail creates a more powerful image...
I hope you enjoyed this three part project! It probably took me about 6 hours to create the entire wreath.

As far as my 100 projects... I'm counting this as three!! Hee hee!!

P.S. I'm still in love with Authentique!!

Pin It