Showing posts with label 6x6. Show all posts

Monday, November 27, 2017

AUTHENTIQUE PAPER: Remember December Mini Album

I would like to say that I always finish every project, but that is not always possible when the holidays are right around the corner. To make the completion of my Colorful Christmas December Mini Album a reality, I decided to prep a few things early to make it a little easier to create during the upcoming busy season.

To start, I grabbed a container to keep everything in. This is an Ikea basket, but others are just as fantastic. Then I just started grabbing things from my stash. I have had some of these items for years!
I pulled stamps, washi tape, alphas, ribbons, wood pieces, enamel dots, and other fun embellishments to add to my mini as I go.
 The Colorful Christmas 6x6 Bundle is perfectly sized for projects like this.
I then grabbed my foundation pages. I bought a few of these foundation pages from a sale awhile back. The days would have been wrong, so I printed new day names on sticker paper and cut them out with scissors. Once I create each page, I'll either hand write, or type using my manual typewriter.
 Having each of the patterned papers pre-cut will save time when I start creating next month.
All I need to add is a stamp pad and a few colored pencils. Any leftovers could easily be turned into a couple of Christmas cards.
I found this cute album on sale, and gussied it up with a little punched reindeer edge, and a journaling card.
 Adding a little faux stitching makes this more personalized.
 Because I know that the first part of the month will be hectic, I created a few Colorful Christmas foundation pages to start.
 I wanted something for the inside cover, so used my Silhouette (#111484) to cut a large tree, and added a Details sticker and an enamel star. The "Story" page will have some of my hopes for the Christmas season, possibly a wishlist of fun events.
 The next three pages are to be used with the foundation pages. Each will sit on the larger squared section, with the journaling or messages below them.
Hopefully this inspires you to gather all of your supplies just a tad bit early for some fun December Mini Album making. A little preparation now, will make the project easier to complete.
Other Supplies Used: alphas (Thickers, chipboard and alpha stickers), various washi tapes, Twinery twine (Blossom, Cappuccino, Maraschino), ribbons, buttons, enamel dots & shapes, stamps (Lawn Fawn Milk & Cookies, Essentials by Ellen - Light Parade), mini album & inserts, Silhouette Online Store & Cameo
Pin It

Wednesday, January 21, 2015

AUTHENTIQUE PAPER: Valentine's Card and Post Box with "Crush"

Hello! Today on the AUTHENTIQUE BLOG I am sharing a fun set of cards with a cute Valentine's post box that I designed. I used the 9" Creative Station to easily create the mailbox.
Supplies Used:
Authentique Paper: Crush Collection (Darling, Frilly, Herald, Sweet, 6x6 Bundle, Authentic Life Cards, Components 6x12 Cardstock Accents, Card Making Stack)
Other Supplies: paper mailbox, Xyron 9" Creative Station, buttons, flower brad, twine (Twinery-Maraschino), word paperclip (Freckled Fawn), dimensional adhesive, Wink of Stella Clear glitter brush
Pin It

Wednesday, August 21, 2013

AUTHENTIQUE PAPER: A Thrilling Way to Add Interest to Layouts

On the Authentique blog today I show how you can recreate this great layout from the Create-N-Connect/Craft & Hobby Association show. There is a of interest by using almost every pattern in the 6x6 pad, and this is an easy way to use them all at the same time. Check it out!

Pin It

Sunday, August 18, 2013

My Project Life Basket: How I Organize My Weekly Scrapbooking Part 1

I figured out the cause of my lack of mojo. An unclean room (since tidied!) and the lingering thought that I haven't really started my summer of Project Life... I like the idea of capturing what goes on during the week, however during the school year it's just not feasible. Not because I cannot keep up, more because life is a lot more monotonous, scheduled, the same each week.

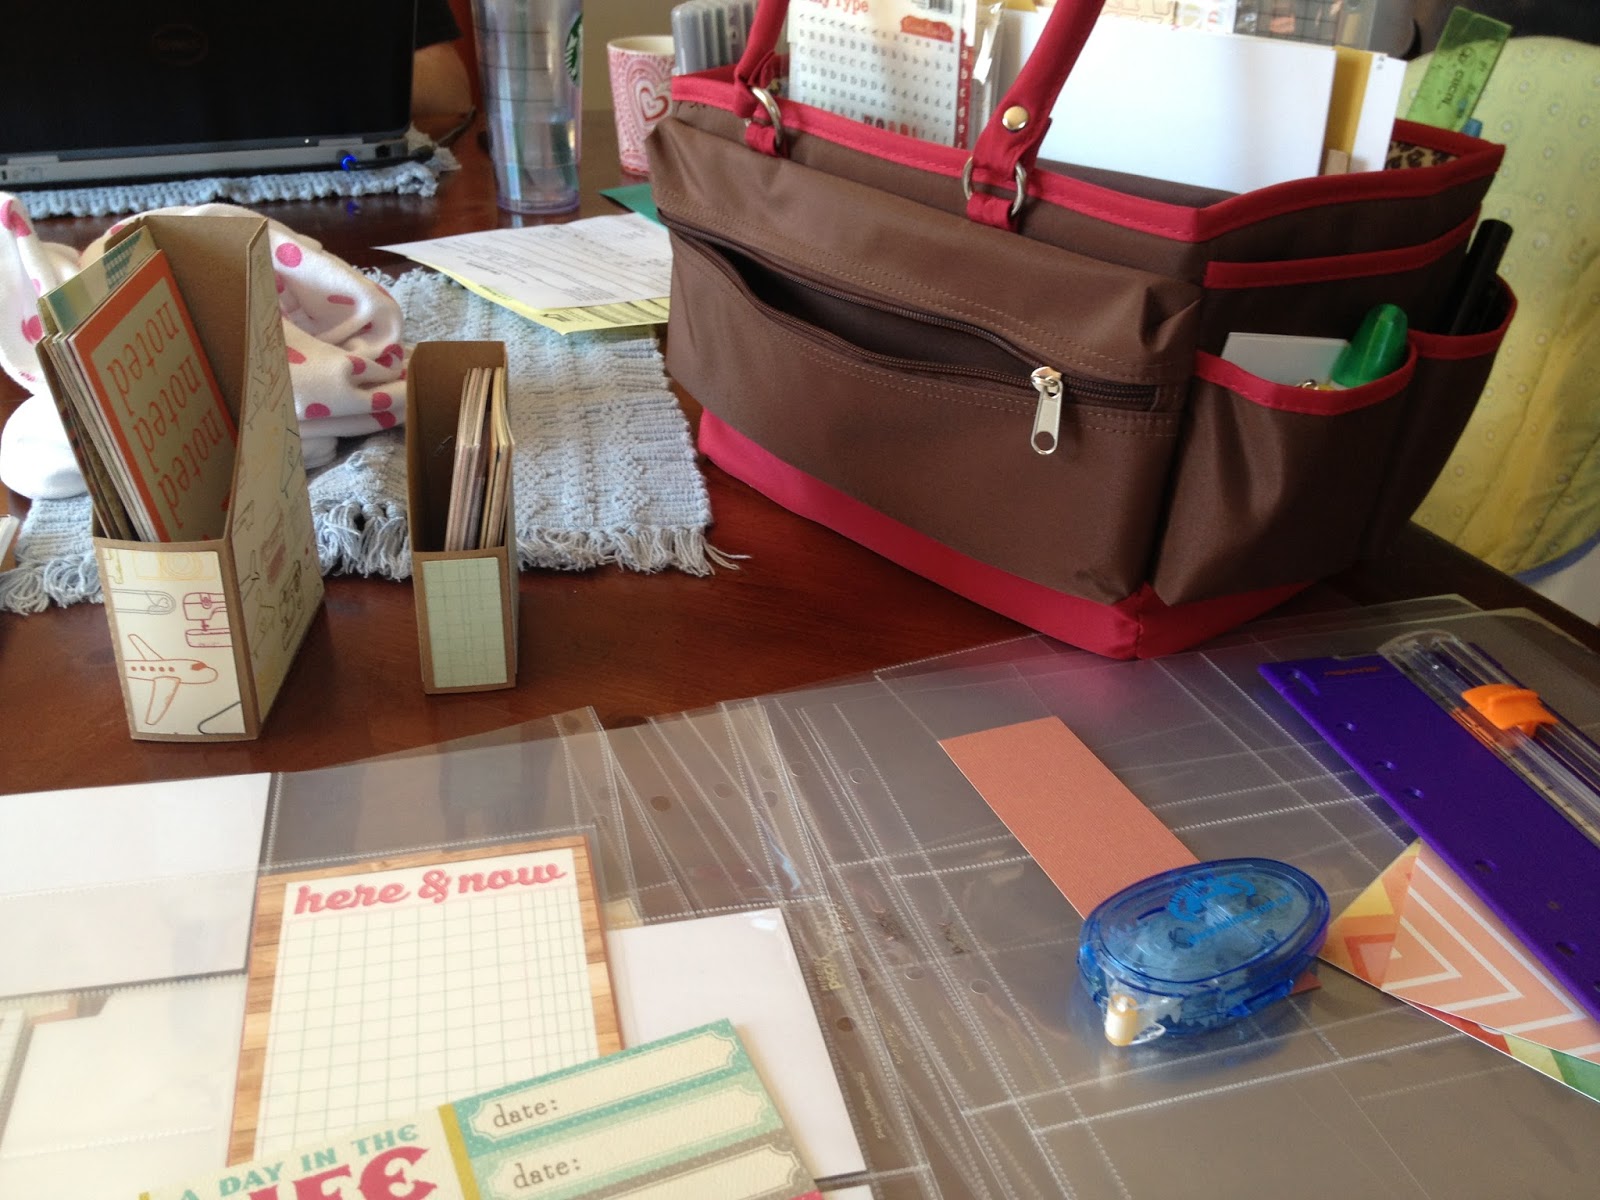
And since I have a studio to work in, I really cannot drag all of my stuff downstairs, or other places. So I created a PL basket. Just enough stuff to create at least a month's of pages without having to have anything additional. I also kind of enjoy not being attached to my Silhouette (blasphemy, I know!!) for everything. I could just go buy the kits, but that's no fun!! I have the page holders, but really just want to use my stash for the filler cards.
Here's my basket!! It seriously has everything I need! I already made a month's worth of pages. In 24 hours. Seriously! Even my cute Xyron 1½" Create-A-Sticker Machine!!
And the other side.
I have quite a few pre-cut 4x6 and 3x4 cards that I made a couple of Silhouette magazine holders for (4x6, 3x4). Include a 6x6 pad of cardstock, and at least one of patterned paper, or the leftovers of one of my Gossamer Blue kits... And the month is set.  
A handful of various letter sets, used up (almost) and brand new. All small and rather thin. This way, I can put them on pics, pages, etc.
Random assortment of enamel dots, flair, Elle's Studio pieces, etc. Anything small and fun.
A date stamp and some sequins. In those little bags that come with sweaters.
Scissors, a ruler, corner chomper, Signo pen, at least one color of journaling pen (but who's counting... I have six on the other side).
Small cutter and 8.5"x11" cutting board.
Mini stapler and a sketch pad.
And here's the beginning of my pages. I'll have to show more this week. I'm super excited to start getting somewhat caught up!!

Tomorrow, I am going to share my tricks for organizing my weeks and my photos. I have a few Apps that I LOVE that make this whole process SO much easier. Especially when I don't have a great photo printer in my house.

And just because... My newly organized buttons and brads! I took out all of the tiny ones... Love the color, NEVER used them.
Don't they look all pretty now?!?!?! Although, I realized I really need more yellow buttons. That one is looking a little lonely.

***Project Life is a system of memory keeping created by Becky Higgins.  You can learn more here***


Pin It

Thursday, October 11, 2012

AUTHENTIQUE & Unity Stamp Company Blog Hop


Good Morning everyone! Welcome to the Authentique and Unity Stamp "Project Inspiration Blog Hop"! If you came from Shellye's blog over at The Papered Cottage, you're in the right spot. If you would like to start from the beginning at the Unity Stamp Blog.

In case you got lost along the way, here is the blog list.
Heather Conklin - http://goldiecar.blogspot.com/   <--------------------- YOU ARE HERE!

For today's project, I created something that I've been meaning to create now for three years, a "December Daily" mini album. I know that October is a little early to be making something for the holidays. Normally I am never so prepared, or early with most anything. It just so happens that we are going to be moving in the near future, so my scrappy area will be "mostly" packed up for awhile. I'm planning ahead. And with the gorgeous Christmas and Santa stamps that I had available to use, I couldn't resist!

See!! Isn't that Santa just adorable?!?! With my December Mini Album, I decided to sprinkle the stamps in various places, both in ink and embossing. I started with a Silhouette cut of "December" using last year's Wonder line and some cream cardstock. The cover was covered in Festive's Merry. I also used Details, some May Arts ribbon, a couple of button pearls, and a neat skeleton key that I found at the hardware store.
In each page, I combined both cardstock, Authentique papers, Authentique Details and Unity Stamps.
I loved embossing with the Unity Stamps. They made such clean images.
Doesn't the embossing look great on this one? I just loved how the snowflakes popped in black!
I even was able to use some more of the Wonder in a few pockets throughout the book. I really love how the older lines blend with the great new ones!
The Santa Claus was just too adorable!!
And a little pocket envelope for a letter to Santa.
I couldn't resist using the large quote stamp a few times.
And Christmas Day! I cannot wait to enter the photos for this day.
I really hope that you enjoyed seeing my Christmas Mini Album. Now that you've seen my work, please continue to Jen's blog over at The Buck Stamps Here. Have a great day, and make sure to comment on each blog as you go. Both Authentique and Unity have some lovely prizes!!

Authentique Collections: Festive Collection, Peaceful Collection, Wonder Collection, papers and Details
Unity Stamp Company: Velvet and Lace Flowers in Buttercream
Other Products: 3L Adhesives: Dimensional pop dots, Imagine Crafts Ink: Olive Grove, Pear Tart, Bamboo Leaves, VersaMark, May Arts Woven Burlap ribbon, hardware skeleton key, found pearl buttons, AC embossing powder, Echo Park brads, Basic Grey brad, kraft paper, Core'dinations cardstock, Bazzill cardstock, Hambly overlay, Cinch binding, Twinery twine, Jolee's stickers
Pin It

Friday, August 17, 2012

AUTHENTIQUE PAPER: Basically Bare Hop

 As a teacher I know all too well how short summer is. I also know how exciting this time of year is. I love the smell of school supplies, a clean and shiny classroom, and planning for the start of another amazing year. For those very reasons, I love working with Curiosity
For my first project, I created a little Congrats card for a lovely co-worker who received a teaching accolade. I really wanted to showcase the fantastic Basically Bare flower against all of the wonderful patterns of the Authentique Paper. I left the leaves plain, stamped the larger petal with yellow chalk ink, and lightly misted the smaller with some grey mist.
 My second project uses Basically Bare's mini album. I loved using all of the different textures and materials. I covered the kraft of the owl with Academic, misted the wings and eyes, then used grommets to attach the wings to the body. For the eyes, I drew the pupils and highlights.
Since I don't have a school-ager yet, I just found some fun photos from the past few months before our newest was born. I wanted to make a mini that my little girl could have. I loved adding the Details throughout the album.
I even broke out my stapler with this project. It was fun using school supplies on my crafty endeavors.
*****
Make sure that you head to the Authentique Blog for Day Two of fun and prizes with all the members of the Authentique Design Team and Basically Bare!

Authentique Products Used: Curiosity Collection, Details stickers; Basically Bare Products: Mini Book, flowers, owl
Other Products: Silhouette, Memento Ink-Gray Flannel, Colorbox Chalk Ink-yellow, Twinery twine, , 3L adhesive, Signo white pen, Glue Dots, ribbon
Pin It

Monday, August 8, 2011

I LOVE Authentique!!!

I saw the first few sneaks of Authentique before CHA, but was even more amazed by them once I actually played with the papers! I couldn't find the brand in my personal LSS, but my friend Karen lovingly snagged me a few sheets of paper, a 6x6, and some of the embellishments from an LSS that she knew about. They are all from the Blissful line. So far... I'm in love!!
This card uses some of the 6x6 pad, some lovely satin ribbon in a matching gray, one of the Authentique embellishment sayings that I stapled for emphasis, and some iRock bling!
I used some more of the 6x6 pad (love that thing!), another Authentique quote, a Martha Stewart punch, and some paper raffia that I untwisted and tied into two 'double bows'. Of course i had to add some more bling (Theresa Collins that my lovely swap box partner sent me!).
I actually used the cover of the 6x6 pad for this card... It worked perfectly! I then added strips of the regular paper, edge punched part of it, added a diecut sentiment and fleur-de-lis and a button.
I really love this look! I love seeing all of the different patterns together. This is a combo of both regular papers and 6x6 pieces. The circles are all pop-dotted, and then I added bling, a button, diecut and twine for fun. Just to add more interest, I matted the dots in black, pearl cream and pearl pink paper. I also used the saying stickers from Authentique!
I kind of really like this one! I used the raffia twine for more color against the 6x6 papers. I then used the saying that is actually on the bottom of each 12x12 sheet, then pop dotted an Authentique quote. I also added a little Glossy Accents for more definition.
I used both the 12x12 and 6x6 papers, wove them together, stamped my sentiment and added bling!
This is a great way to use up scraps! I took a few of all of the papers, added a ribbon, stamped my sentiment and then pop-dotted it! I also inked the edges of the sentiment.

Well... I'm 7 cards down in my 100 projects until I can purchase scrappy items again... I'm becoming a powerhouse. I also have 2 layouts that I will hopefully debut tomorrow or Tuesday. I have to get a few photographs printed first :)
Pin It