Showing posts with label flair. Show all posts

Tuesday, June 21, 2016

June 2016 Projects From the June Gossamer Blue Main Kit

I had to wait a few days to break into my June Main Kit from Gossamer Blue. Summer just started, and we are already having a blast at a our house. The girls and I crafted quite a bit today, and here is what I ended up with!

I loved this Pinkfresh paper. It went perfect with this lovely black and white photograph of the wonderful spot in the painting studio of my alma mater. The flair is from my stash, and the sequins are from an older GB Life Pages kit.
This photo sums up my littlest to a tee. She's funny, she's silly, and she's all mine. I added a little bit of black cardstock and a print and cut file by Simple Stories.
We have spent much of our Spring at some lovely T-Ball games. My little player is fierce, bold, and such a good team player.
I think I craft about this little monster every time I have a set of projects. The past month or so, he has put us through the ringer. A few issues and a few visits to the vet. Thank goodness that's over now. I love all of the pops of black, and the enamel dots.
And of course a few cards. I snagged an older GB Life Pages card, using some Glossy Accents on the balloons for a great birthday card. The other two use another print and cut, this one by Amy Tangerine.

I think I will try to figure out how many extra cards I can make with the little bits and pieces that are leftover from the June Main Kit. I'm guessing about eight more :)
Pin It

Thursday, June 2, 2016

AUTHENTIQUE PAPER: 4th of July Fun with the Freedom Collection

I'm going to Throwback Thursday on this fun post from last year using the fantastic Freedom Collection by Authentique! The cut files are all from the Silhouette Online Store, and the "Fireworks" flair is from Panda Eight Designs.


Pin It

Wednesday, September 9, 2015

GOSSAMER BLUE: Delight in the Details Class and Class Kit!!!!

http://www.gossamerblue.com/product/delight-in-the-details/
I am SUPER excited to share with you that I was asked earlier this summer to help contribute for a Gossamer Blue class. The fabulous Jill Keller put together this course, and chose all of the contributors: Monika Wright, Emily Spahn, Sabrina Alery and ME! It's called Delight in the Details.

From Gossamer Blue: Delight in the Details: a class focused on taking your layouts from good to gorgeous! Learn to layer and embellish while focusing on techniques for enhancing page backgrounds, clustering embellishments, creating dimension and all of the little things that will make your finished projects stand out and be noticed. Register now, as class begins September 28th!! And best part, if you register soon, you get a fantastic stamp set designed by One Little Bird.
There's also a class kit! And seriously... This class kit is AMAZING! I really loved all of the details, the embellishments, the sequins (oh, the sequins!!)...
I couldn't resist snagging you a little sneak of one of my four (4!!) projects that I created using this kit. Let me know if you join the class! I'd love to see what you come up with.

Pin It

Friday, July 31, 2015

Paper Issues: Sketchy Saturday-July 2015 Edition

Here is my version of July's fun Sketchy Saturday from Paper Issues. I really wanted to create a bold statement with this layout, so used a lot of black and white on this. I also used quite a few older patterned paper scraps and some of the new Illustrated Faith alphas from Bella Blvd. that I had just gotten.
Love this picture. And I really love how the layout mirrors a lot of the same colors. Such a sweet memory. Pin It

Wednesday, April 1, 2015

Let's Do This (October Shop Your Stash Kit)

Some layouts are just too darn fun to not create. This one used the October Shop Your Stash kit that I had made, plus a fun sheet of Teresa Collins paper (no clue what line... I looked, but couldn't find it). I couldn't resist adding it to my layout.
I mean, if you HAVE to get older and get glasses, you might as well scrap about it, right?!?!?

PS... I'm hitting 400 posts (WHAT?!?!?!) on Friday. Check back in for a Giveaway! I'm going to celebrate! Pin It

Tuesday, February 25, 2014

Gossamer Blue Life Pages (January 6-12)

This was a fun week. Mostly. We got back into the routine of non-Christmas vacation. Had a bit of 12th Man fever. GO SEAHAWKS! Miss I was able to go to TinkerTopia (and be on local TV!) and I figured out how to comb those My Little Pony dolls from Build-a-Bear (wig brush, warm water and detangler).

In the midst of the January Gossamer Blue kit, I mixed in some of my Elle's Studio stash, and whatever letter stickers I could find. This month uses some Fancy Pants chipboard, Cosmo Cricket Tiny Type and Basic Grey stickers.
If you are in the greater South Sound area, I suggest checking out TinkerTopia. It's a "Creative Reuse Center" that blends recycling and art. It's pretty darn fun!
I loved the sweet pics from this week. I love capturing honest, wonderful moments of pure joy. Pin It

Monday, February 24, 2014

Gossamer Blue Life Pages (December 29-January 5)

I started this year by snagging the wonderful Gossamer Blue Life Pages monthly kits. I really adored their Scrapbook kits, but life was getting in the way of me using them as much as I had liked... So I made the switch, and will scrapbook using past kits and my stash instead of the monthly kit. I had made a deal with myself, that if I didn't complete the four layouts needed for the Album Challenge, I had to give up my scrapbook kit until I could make that happen. I also really liked seeing the great things that came out of the Project Life style of scrapbooking, but really wanted my layouts to express myself, and think that the GB kits really do that.

This is the first full week of January. I started with Gossamer Blue's January 2014 Kit and their amazing die cuts! As you can see, we hung out, I added a few pics of what we did, and my sweet date with my oldest.

Can you tell that my littlest figured out how to snap her own pics?? I also have the same version that my oldest took when she was this age!! Too sweet!
Most (if not ALL!) of my pics are taken with my iPhone... LOVED the movie Frozen. If you haven't already seen it, I highly suggest going to see it!! Pin It

Tuesday, October 8, 2013

Xyron and Doodlebug Help Celebrate Fall!

I am loving the fall weather. Fall in the Pacific Northwest is usually gorgeous, but this year has been all about rain and thunderstorms. I kind of love it. It was on one of these very days that we took a ferry ride that this adorable photo was taken. I love my little monkeys, and they normally aren't this sweet with one another.

For this layout, I really wanted to play off of the aqua skirt that my oldest was wearing. I used the Happy Harvest Plentiful paper in the background, and die cut a piece of Happy Harvest Sunflowers to base the layout from. I'm a sucker for woodgrain of any kind, and the Happy Harvest Sunflowers paper is a beautiful red.
I used kraft paper to give the photo a little bit of a natural border, then popped that against the opposite side of the Happy Harvest Plentiful paper. The journaling was created by running two die cut pieces of kraft and Happy Harvest Autumn Leaves through my Xyron 9" Creative Station and using a Signo Uniball pen for the journalling.
A sweet banner made from pieces of the Happy Harvest Fancy Frills stickers and Happy Harvest Doodads, along with some burlap alphas finished off this layout.
This little foxy card was so easy to put together using mainly stickers from the Happy Harvest Icon Sticker and Happy Harvest Quotes stickers. I also used a corner punch to add some detail to the Happy Harvest Apple Orchard and Happy Harvest Autumn Leaves papers then ran all of them through the Xyron 9" Creative Station. And the aqua blue makes the orange stand out. LOVE!
I cannot stand to see scraps of paper lying around without a purpose, so created this card using some die cuts that reminded me of Fall using the Happy Harvest papers, Happy Harvest Quotes, Happy Harvest Doodads and Happy Harvest Pumpkin Gingham Washi Tape. I even popped in a little ticket from the Happy Harvest Fancy Frills sticker sheets. The leaf was easy to create, just die cut, then wrinkle it up as much as you can right before gluing it down with Xyron’s Adhesive Solutions 3/16"  Dots. This way, I could get the leaf to look a little more realistic.
Lastly, a sweet little card for a friend who just bought a new house. I loved the Harvest Homes paper, and it will be perfect for moving in the Fall. I didn't want to busy up the streets too much, so added a few simple touches with the Happy Harvest Quotes, Happy Harvest Doodad and Happy Harvest Fancy Frills border sticker.
Thanks for celebrating just a little bit of Fall with me! I hope this inspires you to get some adorable Doodlebug papers and your Xyron products and start creating!

Supplies Used:
Xyron: Xyron MegaRunner, Xyron 9" Creative Station, Xyron Adhesive Solutions 3/16" Dots
Doodlebug: Happy Harvest Collection: Autumn Leaves, Apple Orchard, Plentiful, Sunflowers, Harvest Homes, Icon stickers, Fancy Frills stickers, Quotes stickers, Doodads, Pumpkin Gingham Washi
Other Supplies: twine, dimensional adhesive, cardstock, kraft paper, die cut machine, corner chomper Pin It

Thursday, September 19, 2013

Elle's Studio Sketch: Remembering the Everyday

I love when one photograph can evoke a memory. I was fortunate enough to be able to spend the summer with my little girls. I realize that one day, they won't be so little, and probably won't want to spend as much time with me. I am going to grab them and hug them for as long as I can.

This layout used the Elle's Studio sketch. I changed a bit of it, making it my own. I really loved the colors in the photograph, and wanted to pick up the tiny bit of pink that was there. Just to pop against all of the turquoise that was also there.
I started with a vanilla piece of cardstock, then added the Carta Bella paper. It needed more, so I started distressing with a pair of scissors but went a little crazy and accidentally cut into the paper. So the distressing is more than I would have like, but I love how it turned out.

I also used the August Elle's Studio kit, along with quite a few pieces of my Elle's stash. A few pieces of random cardstock (Studio Calico HeyDay), a piece of flair (Ormulu), and some enamel dots... And it was complete. Pin It

Sunday, August 18, 2013

My Project Life Basket: How I Organize My Weekly Scrapbooking Part 1

I figured out the cause of my lack of mojo. An unclean room (since tidied!) and the lingering thought that I haven't really started my summer of Project Life... I like the idea of capturing what goes on during the week, however during the school year it's just not feasible. Not because I cannot keep up, more because life is a lot more monotonous, scheduled, the same each week.

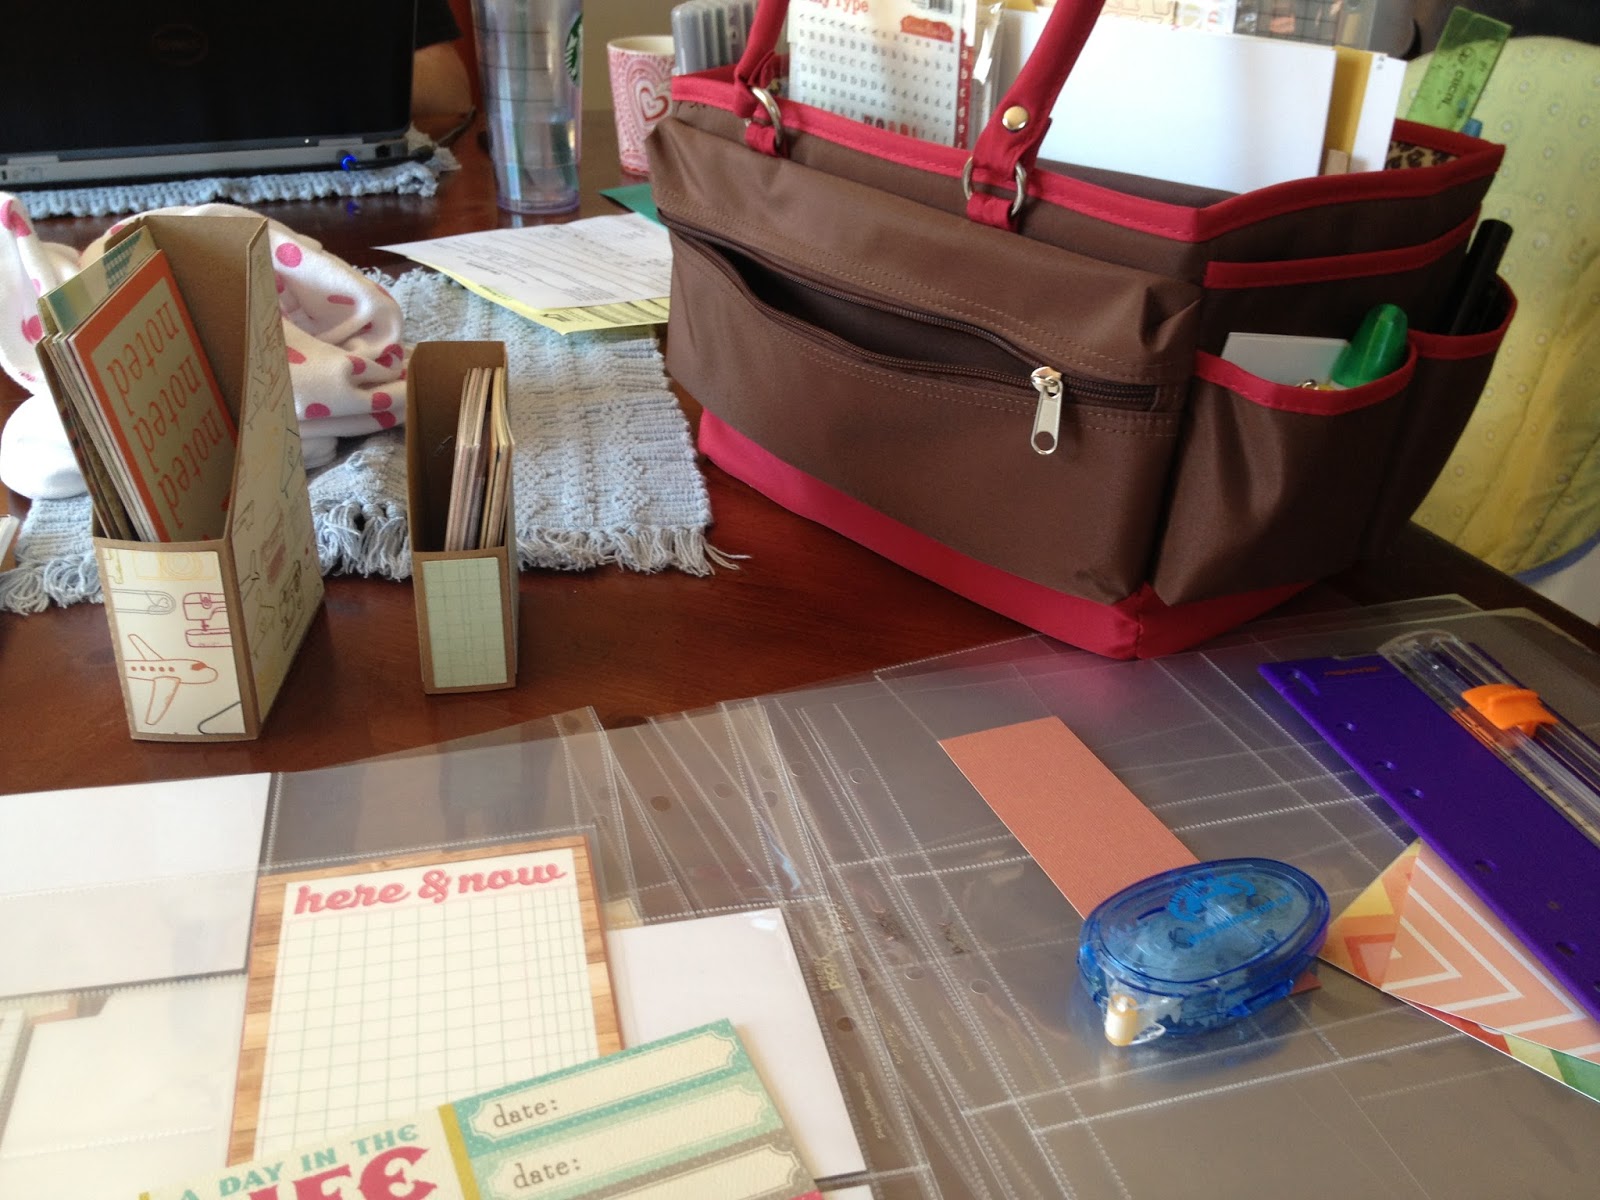
And since I have a studio to work in, I really cannot drag all of my stuff downstairs, or other places. So I created a PL basket. Just enough stuff to create at least a month's of pages without having to have anything additional. I also kind of enjoy not being attached to my Silhouette (blasphemy, I know!!) for everything. I could just go buy the kits, but that's no fun!! I have the page holders, but really just want to use my stash for the filler cards.
Here's my basket!! It seriously has everything I need! I already made a month's worth of pages. In 24 hours. Seriously! Even my cute Xyron 1½" Create-A-Sticker Machine!!
And the other side.
I have quite a few pre-cut 4x6 and 3x4 cards that I made a couple of Silhouette magazine holders for (4x6, 3x4). Include a 6x6 pad of cardstock, and at least one of patterned paper, or the leftovers of one of my Gossamer Blue kits... And the month is set.  
A handful of various letter sets, used up (almost) and brand new. All small and rather thin. This way, I can put them on pics, pages, etc.
Random assortment of enamel dots, flair, Elle's Studio pieces, etc. Anything small and fun.
A date stamp and some sequins. In those little bags that come with sweaters.
Scissors, a ruler, corner chomper, Signo pen, at least one color of journaling pen (but who's counting... I have six on the other side).
Small cutter and 8.5"x11" cutting board.
Mini stapler and a sketch pad.
And here's the beginning of my pages. I'll have to show more this week. I'm super excited to start getting somewhat caught up!!

Tomorrow, I am going to share my tricks for organizing my weeks and my photos. I have a few Apps that I LOVE that make this whole process SO much easier. Especially when I don't have a great photo printer in my house.

And just because... My newly organized buttons and brads! I took out all of the tiny ones... Love the color, NEVER used them.
Don't they look all pretty now?!?!?! Although, I realized I really need more yellow buttons. That one is looking a little lonely.

***Project Life is a system of memory keeping created by Becky Higgins.  You can learn more here***


Pin It