Showing posts with label card set. Show all posts

Wednesday, April 8, 2026

THE GREETING FARM: Thanks A Sloth Card Set


For today's post, I bring you a pair of cute sloth cards using the Thanks A Sloth stamp set from The Greeting Farm. I just adored the cute sloths, and have been waiting to use these on a few fun projects. 

I couldn't figure out which of the sloths to create a card with, so just made two of the same style of card, with a few tweaks to each one. 


I colored both sloths at the same time, so they were easy to match using alcohol markers. Once colored, I cut both out with a sharp pair of scissors. 

Then I used an arch die to cut out a window, then stamped the sentiment below. I inked the background with a cloud stencil from Lawn Fawn, then layered the sky behind the frame. I grabbed one of my tropical die sets from Diamond Press and cut out a bunch of leaves. 


I created a pair of scenes by changing up how the leaves were used. They became a seat for the birthday sloth, and a tree canopy for the hanging sloth

Thanks for checking out the blog today, and happy creating!

<3 Heather

Pin It

Monday, April 6, 2020

AUTHENTIQUE PAPER: Happy Easter Week from all of us at Authentique!

It's almost Easter and that means we are going to share some fabulous Easter and Spring projects with you! We have had so much fun creating some wonderful things, especially since the world is in such upheaval.
*   *   *   *   *   *   *   *   *   *
Hello, and Happy Monday! Heather here, and I created this fabulous Watering Can Box with 3D Daffodils. Daffodils are so prevalent in the Pacific Northwest, there are even parades for them.
For this project, I used a fabulous cut file from the Silhouette Store by a designer named Tanya Batrak.
I really wanted to stay true to the coloring of the watering can (and it even tricked my husband when I was putting it together!), so grabbed cardstock from the Spectrum Series, using both sides of Silver Dollar to get both the stripes and dots in my project.
The tag was a little tag cut from some of the Cottontail Eight and a few of the Elements die cuts. Using foam adhesive in between the layers created some fun interest.
The daffodils are a combination of simple, white cardstock, Lemon Drop Spectrum, and the March cardstock from the Calendar Collection Solids cardstock pad.
I am really happy about how this project turned out. I think that the Cottontail tag lends itself both to Easter, but is Spring enough to last the season. This will be a really fun decor item to leave out during the next few weeks to brighten our spirits.
To round out today's post, I have two Easter cards that I created a bit ago. I really loved how colorful the Cottontail collection was, and how easy it was to pull together a few cards featuring the Easter images.
The first card is a combination of papers from the 6x6 Bundle and the cut-aparts from Cottontail Eight. A little die cut border, and trimming down the cut-apart make this card sparkle. Remember, if you want just a little pop of additional color, use your Spectrum series as your card base.
The last card also uses some border dies for interest, layers a wood veneer rabbit that I stole from a banner found in the Dollar Spot, and a few of the die cuts from the Elements die cuts page. Thanks for "hopping" along with us today, and we cannot wait to share with you some more projects this week!

Authentique Paper:
Cottontail collection: (6x6 bundle, Elements die cuts, Three, Five, Six, Eight), Spectrum Series: (Orange Blossom, Silver Dollar), Calendar Collection: (March cardstock)
Other Supplies:
foam adhesive, die cuts, white cardstock, wood veneer rabbit, hot glue, Art Glitter Glue, Silhouette Cameo, cut file (#317513)
*   *   *   *   *   *   *   *   *   *
Come back Wednesday and Friday of this week for more Easter and Spring projects!
Pin It

Monday, August 20, 2018

PAPER GIRLS CHALLENGE BLOG: Challenge #158 - Summer Sweet Treats

For this challenge, I've been saving this super adorable stamp set from Avery Elle. I watercolored each of the images with bright colors, and paired each of the images with some fun things from my stash.

I love using things from my stash, and adding stamped and colored images along with those is an easy way to create fun and easy cards.
The last touches I added were clear gems, Clear Sparkle pen (Spectrum Noir) on the ice cream, and some glossy accents on the popsicle.

Supplies Used:
Pin It

Monday, February 19, 2018

PAPER GIRLS CHALLENGE BLOG: Challenge #146 - Black & White

Today on the Paper Girls Challenge Blog is our fantastic challenge #146, using only Black and White. I adore challenges. I love re-imagining how I can use up my materials in different ways to  create fun new things. I'm often inspired by techniques that I see online, especially YouTube. My favorites are Kristina Werner and Jennifer McQuire. Both ladies are uber-talented, and have so many ideas.

I was watching one of Kristina's videos, when I realized I had everything I needed to recreate my version of her project using supplies I had on hand.
Concord and 9th is one of my current obsessions. I adore almost everything they come up with, and I'm pretty picky, so that's saying a lot. One of my favorite stamps that I love trying to play with in different ways is their Hello Lovely stamp set. I really love that depending on how you use it, it takes on completely new levels of complexity.

This is pretty simple, and came together rather quickly. Use an embossing buddy, or some sort of prep powder for this, as you really do not want any stray white powder on the black paper. Then with Versamark and your favorite white embossing powder, heat emboss the image. Then use the white gouache paint to create areas of lights and darks in the embossed image. Let dry, and finish with a sentiment. That's it!

Check out the blog for our PG Challenge #146 - Black and White and share with us your new creation! We have quarterly prizes and would love to see you create with us.

* * * * * * 

After creating this, I also realized that it would also fit the Concord and 9th challenge blog, Where Creativity Meets C9 challenge for Watercolors. Enjoy!
http://www.wherecreativitymeetsc9.com/ch18/

Pin It

Friday, November 24, 2017

AUTHENTIQUE PAPER: Frosty Winter Projects

Sometimes a paper collection is so easy to use, that I can create an entire set of cards or projects easily with it. Frosty Winter for me was this collection. Once I started using the fantastic violets and blues, I was hooked. 
  
I started with a fun layout. I really wanted something simpler than complicated. The patterns were just too gorgeous to add anything else. I wanted each to shine on their own, so used primarily straight cuts and layers, instead of more complicated shapes. A black and white photo kept from competing with the amazing violets and blues.
 To make the patterns stand out from one another, I used vellum between some of the layers, and as the snowflakes around the image.
 
 My favorite part of this collection is easy the tiny sentiment stickers that come on the Details sticker sheet. I just loved adding those throughout the layout.
 The tab stickers are also amazing. I loved adding all of the tiny snowflakes to this fun layout. Once the layout was complete, I could stop myself from creating MANY cards with all of the leftover bits and pieces of Frosty Winter.
I started with this adorable printable from Jessica Feig. I had to color him to match the colors of Frosty Winter. I cannot wait to send him to someone just for a smile.
An embossing folder, some scraps, and a little Glossy Accents made this snowglobe card sparkle.
Mirroring the snowflake sentiment on the Details Sticker with a stitched snowflake and embossing folder elevates this tone-on-tone beauty. 
A really simple trick to tone down the colors or patterns of a patterned paper is to place it under some vellum. The vellum is still translucent. so the snowflakes just peek through.
A deep impression, a little twine, and some beautiful sentiments make this an easy card to share.
Thank you for looking. I hope that you found some inspiration to get your Frosty Winter projects started.
Pin It

Wednesday, October 4, 2017

Happy October! (Stampin' Up & Authentique)

I haven't been able to put the Bountiful Collection down since I got it. I just love all of the warm details, the rich colors, and the fabulous Autumn elements. For today's post, I have a pair of sweet, Fall inspired cards.
I started with the Merry Café Photopolymer Stamp Set from Stampin' Up. I wanted to match the rich colors in the plaid of Bountiful One, so used my Kuretake Gansai Tambi Watercolors, and mirrored the aqua and warm red-oranges with paint. 
To make the fun images of the cup pop, I paired each of the cards with multiple Details stickers. Some of which I popped up with dimensional adhesive.

Thanks for spending some time with us this morning. Have a great Fall day!
Authentique Supplies Used: Bountiful Collection (One, Details Stickers) Spectrum Series (Mustard Seed)
Additional Supplies Used: Merry Café Photopolymer Stamp Set, Coffee Café Photopolymer Bundle,
Kuretake Gansai Tambi Watercolors, Lawn Fawn Lawn Cuts Stitched Rectangle Frames, dimensional adhesive Pin It

Monday, July 6, 2015

Quick Cards from Gossamer Blue Kits

EEK! Sometimes I seriously just take the last little bits of a kit and toss it with some cardstock and card bases to see how many different cards I can make. This set was made using the Gossamer Blue March Main Kit waaaaaaay back from March 2014. I've been hanging onto these beautiful leftover bits since then.


How do you use your scraps? Leave me a link and I'll come check them out!! Pin It

Wednesday, January 21, 2015

AUTHENTIQUE PAPER: Valentine's Card and Post Box with "Crush"

Hello! Today on the AUTHENTIQUE BLOG I am sharing a fun set of cards with a cute Valentine's post box that I designed. I used the 9" Creative Station to easily create the mailbox.
Supplies Used:
Authentique Paper: Crush Collection (Darling, Frilly, Herald, Sweet, 6x6 Bundle, Authentic Life Cards, Components 6x12 Cardstock Accents, Card Making Stack)
Other Supplies: paper mailbox, Xyron 9" Creative Station, buttons, flower brad, twine (Twinery-Maraschino), word paperclip (Freckled Fawn), dimensional adhesive, Wink of Stella Clear glitter brush
Pin It

Saturday, October 4, 2014

Happy World Card Making Day with Xyron and Spellbinders!

Today I'm celebrating World Cardmaking Day with Xyron, Spellbinders and a little bit of Authentique thrown in! To start, I took some papers from Authentique's Grateful Collection and die cut various pieces using the Orchard Harvest Tags and Accents Fall themed Shapeabilities® set from Spellbinders. This set is really great, as you can die cut, emoboss and stencil using the same set. As you can see, I did a combination of all three for the various pieces of each die cut.
I really loved the stenciling capabilities of this set, as I'm not a huge embosser. I don't yet have an embossing mat, so used a slice of craft foam (normally reserved for making dimensional adhesive with my Xyron products) to create the embossed effects with the dies. It wasn't perfect, and I kind of ruined the craft foam, but now I really want to grab an embossing mat and see what these dies and the other Spellbinders Shapeabilities® sets do!
For the second card, I used more of the stencil effects, and was really happy with how this turned out. To better showcase the embossing techniques, I used some of my ImagineCrafts Versamagic Ink in Red Brick on the embossed sections. For both cards, I used my Xyron 3" Sticker Maker for each of the scalloped frame pieces. This is one of my favorite Xyron tools as it is big enough to use on most card-sized pieces, but small enough to stow in your travel craft case and take to crops. I also really like using the Xyron 3" Sticker Maker to make wider pieces of craft foam tape in order to use it on larger areas. My other go-to products on this pair of cards are the Xyron 1.5" Sticker Maker on the vertically striped paper and Xyron's Double-Sided High Tack Tape throughout both cards. This way, I can adhere my pieces securely, but still allow space to bend up the pieces for more dimension.

Supplies Used:
Xyron: 3" Sticker Maker, 1.5" Sticker Maker, Double-Sided High Tack 1/2" Tape

Spellbinders: Orchard Harvest Tags and Accents Fall themed Shapeabilities® set
Other Supplies: Authentique Paper (Grateful Collection: Plentiful, Observance, Copious, Kindred, Foundations One Distressed Solid, Bountiful, Components 6x12 paper die cuts), ImagineCrafts VersaMagic Ink (Red Brick), Staedler TriPlus Fineliner (Nature) Pin It

Tuesday, September 23, 2014

Xyron and Anna Griffin: A Perfect Pairing for Gifts

Sometimes you just need a small gift (thank you, just because, hostess gift). This wonderful pairing of Xyron and Anna Griffin products definitely fits the bill for just that. This little gift set is a box, with four cards in it.
I started by making the box from some of the flocked paper and the amazingly thick, pearlized cardstock. I loved using the luxe flocked paper on the outside of this, as it is really soft. To create the sentiment for this boxed set, I used clear acetate in the "window". This way, I can let the cards shine. Using the Double-Sided High Tack 1/2" Tape made this super easy to put together, as well as let me easily add the acetate into the completed box. 
I created two vertical and two horizontal cards using the Grace Collection and pieces from Anna Griffin's other collections. For the two vertical cards, I started with a base of the thick pearlized papers, then added various patterned and flocked papers, borders, sticker borders and die cuts. Some of the die cuts came dimensional, and some I was able to add layers myself. By running the die cuts through my 3" Sticker Maker, I was able to make sure that they were not going to shift when they were mailed. Rather than pull out my Mega Runner and squish the dimensional die cuts, I just used my Double-Sided High Tack 1/2" Tape to attach them to the cards.
For the two horizontal cards, one had a base from the All About Her Cardmaking Kit, and one I used another piece of the Perfect Palette Cardstock Kit. Then I added more pieces of various die cuts. Lastly, I heat embossed a sentiment from one of Anna's stamp sets in black embossing powder. On these two cards, I really used my Double-Sided High Tack 1/2" Tape. It made the extra embellishments so easy to place. For the embossed section, I ran those two pieces through my 1.5" Sticker Maker before attaching them to the card.
 I really love how easily this small gift came together.
Supplies Used:
Xyron: 1.5" Sticker Maker, 3" Sticker Maker,  Double-Sided High Tack 1/2" Tape
Anna Griffin papers and die cuts    Anna Griffin® Grace Papercrafting Kit,
Anna Griffin® Perfect Palette Cardstock Kit, Anna Griffin® All About Her Cardmaking Kit, Anna Griffin® 60-piece Flocked Paper Collection
Additional Materials: acetate, ribbon, craft foam, Silhouette Cameo Pin It

Tuesday, August 12, 2014
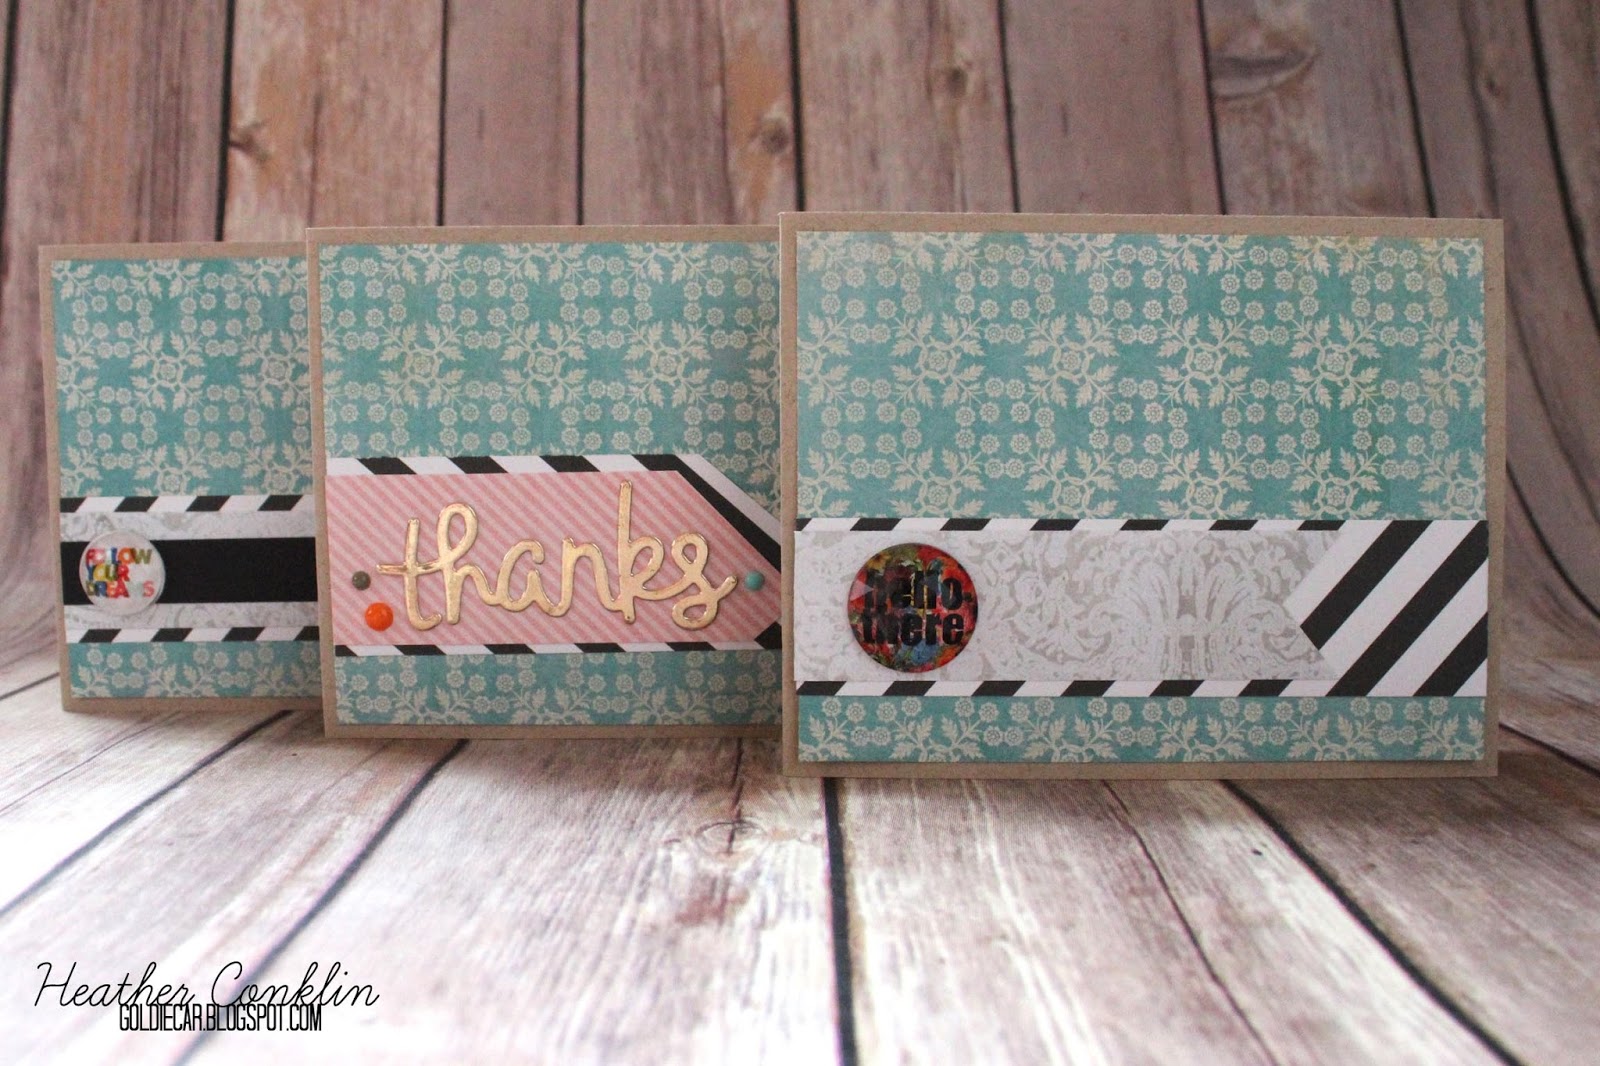
25 Cards from One Collection

In my day job, I teach art. I also am one half of a kick-ass (yes, we are THAT good!) team that takes care of our staff in times of celebration and condolence. After the many years that I have helped with this, I have realized that if I plan ahead and get some of the many cards that will be used throughout the year completed during the summer, I'm a much happier person. Ultimately, I will spend about the same amount of time no matter what, I can just spend it more wisely using similar sketches or designs and make multiples at once. All of these cards use American Crafts: Garden Café collection. Stamps are from: A-Muse, Lawn Fawn and Neat & Tangled.

Sometimes the cards are almost exactly the same, just flip the papers over and switch the embellishments a little.
Use different ribbons to make different looks...
Similarity here: those tags I can never figure out what to do with. 
When you get down to the small pieces, it always helps to make "scrap" cards. Just take all of the little scrap pieces and glue away!
Or make three of a kind. This one was inspired by this card: CARD by Chari Moss. She's amazing!
In some cases... Just using those great embellishments brings amazing results. 
Or border punches and flags!
A couple more combo scrap/embellishment cards.
And a simple, but effective version... Colorblocking!
All in all, 25 cards using a line of materials that I wasn't scrapping with anymore. One more bag of stuff in my stash down! Pin It