Showing posts with label Birthday. Show all posts

Tuesday, February 24, 2026

THE GREETING FARM: Party Animals Birthday Card


There’s just something about woodland critters in party hats that makes everything better… and this card might be my new favorite celebration design! Today I am sharing this fun card using the Party Animals Clear Stamps from The Greeting Farm

I used alcohol markers to color each of the sweet animals, focusing on a combination of various neutral colors to create lifelike animals. I love adding the cute, pink cheeks to each animal, adding a few freckles with a white gel pen. 
Once the one layer card was complete, I added a few of the hats and details, popping those up with some dimensional adhesive. 
The Party Animals stamp set would be perfect for birthdays for all ages, or swap out the sentiment for another and you can send some love from a group instead. Thanks for stopping by, and happy creating!

Pin It

Friday, May 15, 2020

AUTHENTIQUE PAPER: Everything You Need for a Birthday Kit with the Hooray Collection

Hello! Birthdays look a little different right now. Video birthdays, calling, being apart from the ones that you want to celebrate can be difficult. This Hooray collection birthday kit includes everything you need except cake! I'm sending this one out with a mug cake package so that my recipient can celebrate, even though I cannot be with them.
I started with a base of Hooray One, and cut that to accommodate the 5x7" envelope that I knew that I was going to make. I folded this about 3 1/4" on both sides, so that the envelope could be adhered to the center. The belly band was a larger strip of Hooray Three that I waited to glue together until the entire project was complete. The bow was a strip of cardstock layered with Hooray Three. A little bit of foam tape let the Details cardstock sticker stand out.
Inside, I took two large dies and created layered die cuts by tracing the outer edges onto a piece of Calendar collection cardstock (July) and another piece of red cardstock. The little bit of striped cardstock came from a leftover strip of Hooray Six after making the envelope. The banner pieces from the Details sticker sheet was perfect to create some interest as you are opening the birthday kit.
Another Details cardstock sticker and some more striped Hooray Six allow for some easy interest as the recipient opens the birthday kit. 
Once the entire birthday kit is opened, you can see all of the fun pieces that create this special project. 
In the right flap, there is a tag (cut from the collage images on Hooray One using a die set) that is lightly adhered with a removable glue dot. This way, your friend can add that tag to their own present. The candles are also attached to the card using removable glue dots, and then banded to their card so they don't get moved in transit. This flap uses a combination of Hooray Two, Four, Eight and papers from the Hooray 6x6" Bundle.
The right hand side has a little pocket created with pieces of Hooray Two and cutaparts from Hooray Eight. You could also use this pocket to tuck in a gift card. There is also an envelope (cut from vellum so you can see inside) created using an envelope tool that holds confetti created by punching strips of leftover paper once the project was complete. Once those are decorated with some of the Details stickers, they are perfect.
The large dies were perfect for this, as they filled a larger space were cut from red cardstock and the blue side of July cardstock from the Calendar collection. I really wanted to play off the red in the striped paper.
The bottom section uses another die from the same set, and a cutapart from Hooray Eight. To make the cutapart fit the area, it had to be cut down quite a bit.
I kept the card inside this project flat so that it fit inside the envelope. I layered red cardstock with a Hooray Eight cutapart, a base of Hooray Two, and a pair of stickers from the Details cardstock sticker sheet.
I cannot wait to send this on to a lovely friend.
I hope that this inspires you to find alternate ways to celebrate your family and friends during this time.
Authentique Products: Hooray Collection (One, Two, Three, Four, Six, Eight, Details, 6x6" Bundle)
Other Supplies: cardstock, vellum, envelope punch board, confetti punch, tag dies (Felicity Jane), sentiment dies (Diamond Press), twine, foam tape, candles Pin It

Monday, August 20, 2018

PAPER GIRLS CHALLENGE BLOG: Challenge #158 - Summer Sweet Treats

For this challenge, I've been saving this super adorable stamp set from Avery Elle. I watercolored each of the images with bright colors, and paired each of the images with some fun things from my stash.

I love using things from my stash, and adding stamped and colored images along with those is an easy way to create fun and easy cards.
The last touches I added were clear gems, Clear Sparkle pen (Spectrum Noir) on the ice cream, and some glossy accents on the popsicle.

Supplies Used:
Pin It

Tuesday, February 6, 2018

PAPER GIRLS CHALLENGE BLOG: Happy 6th Anniversary!

Hello! It's a Happy Anniversary to the Paper Girls Challenge Blog! They are 6 years old today. Which is amazingly exciting! They are a bunch of great ladies who are pretty darn talented. Today's challenge is all about 6's.
I ended up creating a rainbow card with 6 washi tapes and 6 enamel dots. I love how clean and simple it is. Pin It

Wednesday, January 31, 2018

AUTHENTIQUE PAPER: Party's that POP! with Authentique

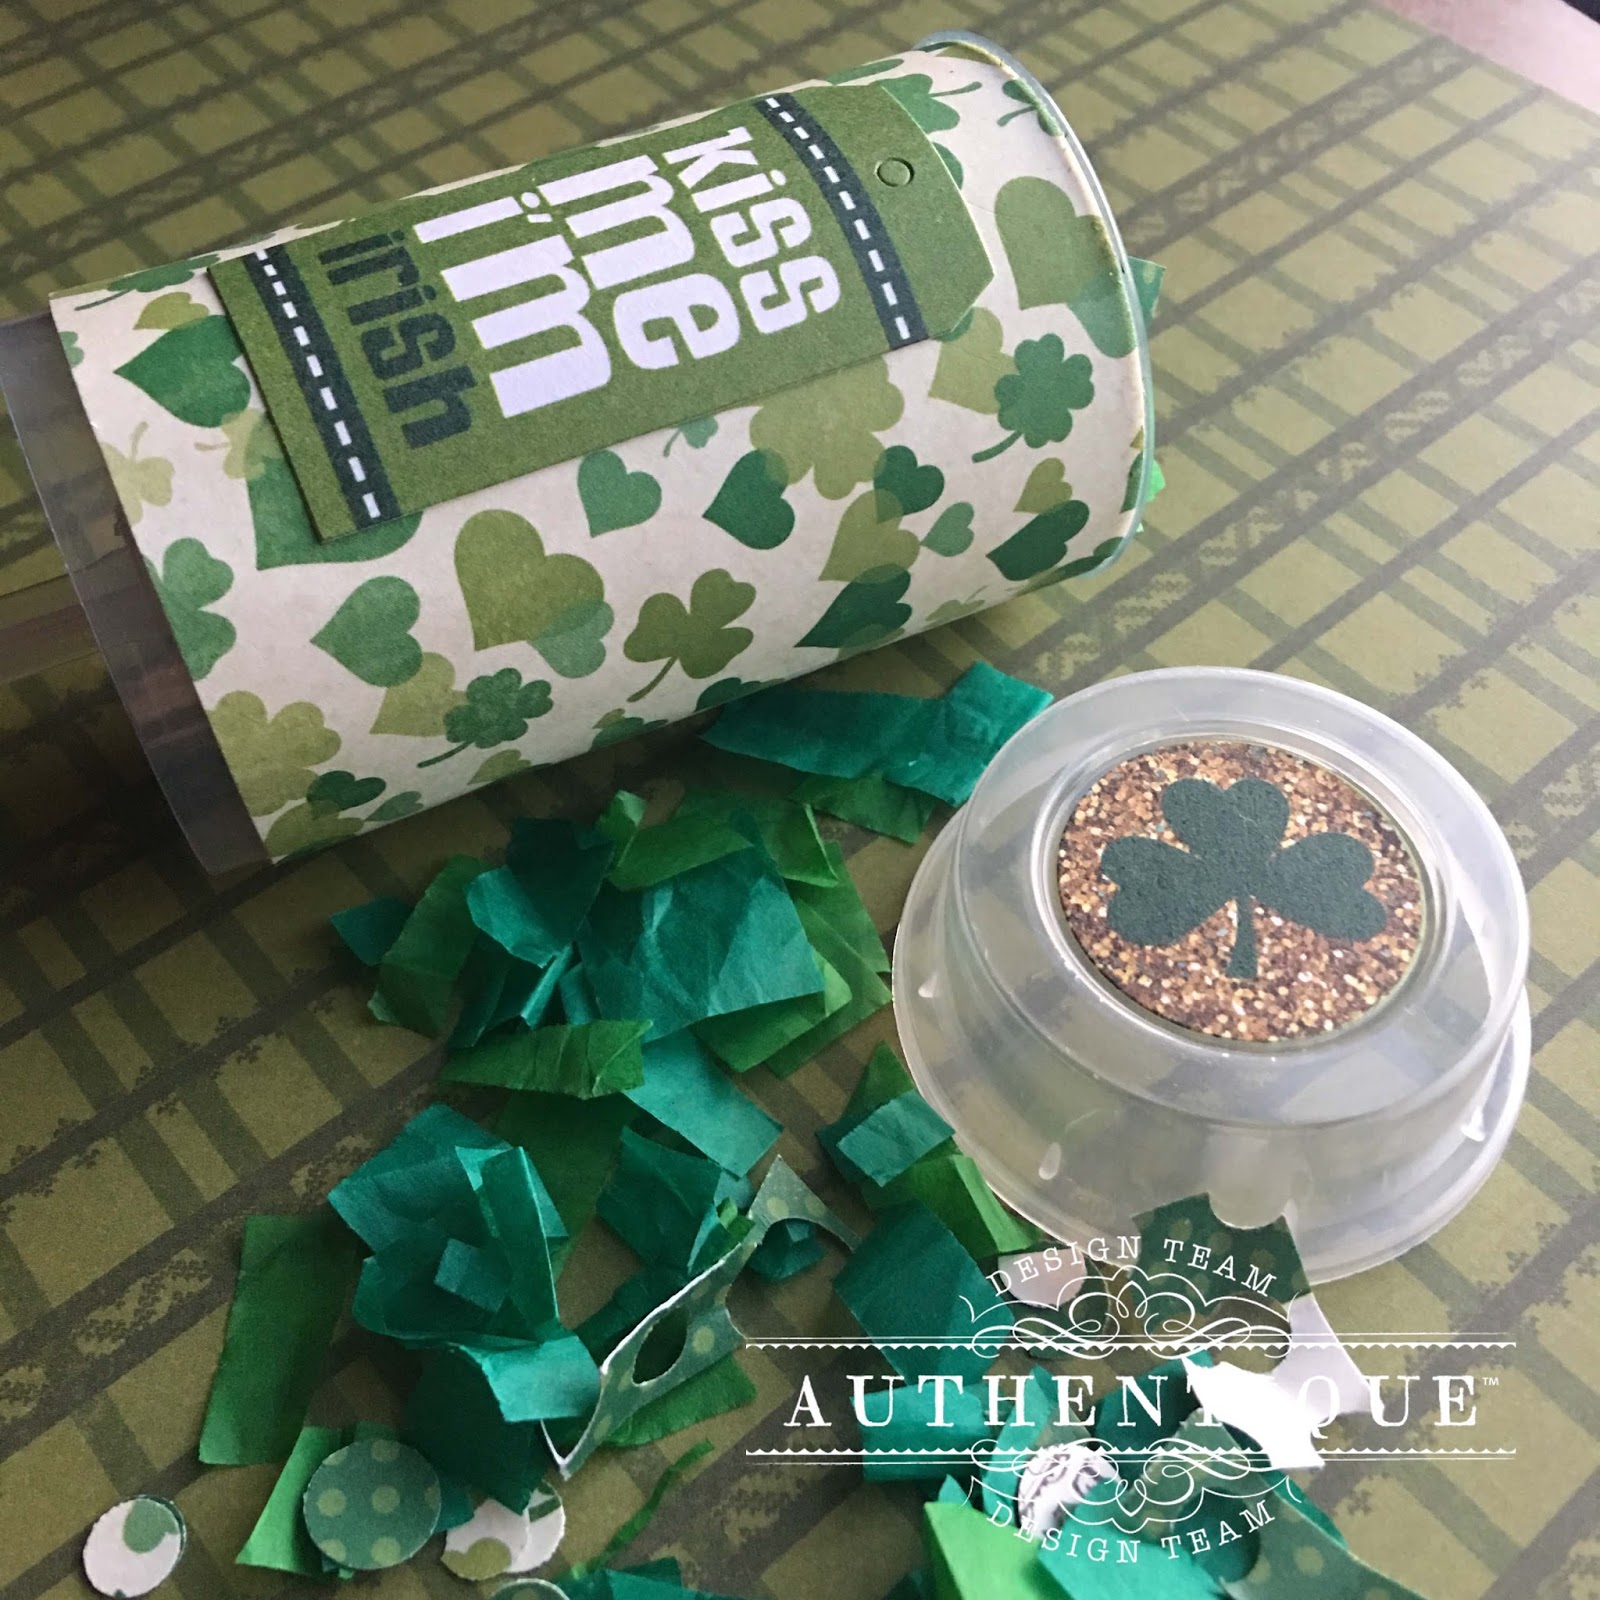
Hello! I wanted to share a fun idea that would be easily repeatable for any holiday or occasion. I created two for Valentine's and St. Patrick's Day using our Lovestruck and Shamrock collections, but depending on what paper collection you use, you could also use them for weddings, showers, or my favorite, birthdays. 
I started with a set of Cake Pop / Push Pop plastic holders. I found mine on Amazon, but there are tons out there at other stores.
I looked for a set that was able to have a lid that could be resealable. 
 
Then I created all kinds of confetti. I punched matching paper until the paper couldn't take it anymore, then I cut those punched areas into strips and added those to my pile. Then, I cut mini strips of colored tissue paper, then cut those strips down to mini pieces. 
It's not horribly time consuming, but it will take more "fluff" than you originally think. 
 
Once all of your confetti and fluff is all cut and punched, put it aside to decorate your plastic holders. I found that the best glue for this was dry adhesive, so got out my Xyron 3" sticker maker. Any strong, non-liquid adhesive (edge-to-edge, strong runner, or strip adhesive) would work best since you will be adhering paper to plastic. 
I cut my paper down to 3x8", then added adhesive. It was enough paper to wrap around the plastic holder, with a little bit of extra coverage in the back to stick the paper to itself. Once you add your paper, decorate with stickers, firmly adhering those to the paper. Then stuff those plastic holders and stick on the lid! 
Once your confetti poppers are all put together, you do need a bit of force to make them pop open, but the results are worth it! 
I would probably use these for indoor use, as you could easily clean them up. 
 I hope that you create some fun party poppers of your own!
 
Pin It

Monday, July 28, 2014

Kid Birthday and Birthday Cards!!

With Littles... You get Little Kid Birthdays, which of course always need cards. Sometimes, I let the munchkins help out, sometimes, they direct what the subject of the card is. Anyway, here are a couple of fun kid-friendly cards. 
The dinos are from a ColorBox set, and of course some Lawn Fawn (Critters Ever After, Say Cheese, Say Cheese Lawn Cuts)
You can't stop smiling when you see these little hearts peeking at you!!
Pin It

Tuesday, July 22, 2014

Happy Birthday from Authentique and Avery Elle!

Good afternoon! I just wanted to share with you a sweet birthday card that was up on the Authentique Blog last week. I didn't share it on the day it went live, so I'm sharing today!! I used the Avery Elle Cupcakes set and Authentique's Radiant Collection.
I'm especially proud of the fussy cutting! I'm not a huge fan of it, but I'm getting there... I just loved the Avery Elle Cupcakes set, as I am able to create SOOOO many combos for cupcakes! EEK! The sequins are a mix of random ones I have in my stash: Teresa Collins, Neat and Tangled, and some that are sewing sequins.
Pin It

Wednesday, July 2, 2014

I Think It's Time For Cake (Pansy #1: ScrapbookSteals Sketch)

I saw this fun sketch by my friend Brenda on the ScrapbookSteals' blog and I just had to play along today. I tried this fun technique with blending fun ink colors over a sketch from watching a few of Kristina Werner's videos (the video for her version). While I didn't exactly do her trick with the kraft paper and white ink... I did combine the white paper and kraft. 
To get the fun background, I took all of these AMAZING pigment inks from Tsukineko/ImagineCrafts called Radiant Neon. I have the entire set and L-O-V-E them.
I took the entire set, and blended them on top of a stencil. This way, they were able to mix together and keep the fun triangle shapes. To make them truly blend, I used a my InkBlushers (also by Tsukineko/ImagineCrafts) to blend the colors together.  
The journaling was created with my Silhouette. I finally got to use my Elle's Studio birthday kit and some of those amazing Freckled Fawn Neon enamel dots. Make sure that you check out today's sketch and play along!
http://scrapbook.steals.com/wp/2014/07/02/maggie-holmes-styleboard-mid-week-mojo-pansy-1/

Pin It

Friday, June 27, 2014

I Have Been the Worst Blogger Ever... SORRY!

So... Every time I've really sat and tried to blog, I've been distracted or just bogged down in a lack of "mojo". It's seriously been since May 1st. That's far too long!! I haven't totally stopped making things, but just haven't had the desire to actually record or share anything at all. Super lame on my part.

A couple of reasons:
-I just finished my National Boards for Teaching. Although that was due mid-May, and my test was at the end of May...
-I think I need glasses, and every time I seriously go to read or craft, I get a headache... Appt. is scheduled and I'll update everyone with info or a pic of me in glasses?
-I've become a SSAHM... That's Summer Stay At Home Mom. Yup. One is all five-year-old drama, and the other "thinks" she's in the middle of potty training. We're working on that one. Also, I seem to be feeding these creatures at ALL sorts of time. I've become a snack dispenser. Too bad I can't get quarters each time they want something :)
-For having summer off, I seem to be busy most days. There's always something going on. It's kind of nuts.

My goal for the rest of summer is to share something at least three days a week. I do have a few fun things going on in the next few weeks, so there are more than enough projects to share with all of you. To start, here's my card for my lovely friends' daughter, who also turned five.
I used the idea of Spotted and Hearted from the Lawnscaping Challenge blog. I used the Critters Ever After (Lawn Fawn) stamp set with my Spectrum Noir pens. The clouds are from a Fiskars punch that I picked up from Tuesday Morning on the cheap! I used some white embossing powder for the stars, and then added the background using three shades of Distress Inks. The pink paper is Echo Park, and the yellow is American Crafts cardstock. My 5-year-old wanted to make sure it was a My Little Pony look-alike, so asked for a "cutie mark" and then named her "Hearty".

Tomorrow, I'm going to share a few more projects!! I'm glad that I'm back to blogging!!

Pin It

Friday, January 31, 2014

XYRON! A Fond Farewell, and Game Day Decorations!

Good Morning! Today is a bittersweet day for me, as it is officially my last post for Xyron Adhesives. I have had a complete blast sharing everything that I have made with all of you. I will forever cherish the time that I spent working for a fabulous company, and alongside some super-talented ladies. 

Even amongst the bitter part, it will be a fantastic weekend this weekend. For starters, today is my birthday! While I'm not going to tell you how old I am, I will say that I'm younger than the Seattle Seahawks who are going to the Super Bowl this weekend!!
Since I was born and raised in the Pacific Northwest, it's a pretty big deal that our Seahawks are playing on Sunday. We watch every Hawks game, and usually my husband attends at least one a year. While our family usually watches the big game, no matter who plays, we don't usually decorate. This year... All bets are off (at least on the decoration side of things!)
I really love this banner. It's fun, and because I didn't use the team name, only a PNG of the Hawks logo, I could break it out again later if I chose to.
My husband was gifted these quite a few years ago, and we get to decorate with them finally! Just a little bit of vintage Seahawks!
For the food picks and the larger logo, I just found a PNG file of the logo online. THIS is the version that I used for this project. My crafty friend Brenda shared with me a fantastic tutorial on how to use your Silhouette's Print and Cut feature. There really are quit a few out there, and this one just worked for me. Once those were all cut, I used my Xyron 1.5" Create-a-Sticker to adhere the logos to a scalloped rectangle that I sized just for this.
Once the logos were adhered to the rectangles, I simply attached some popsicle sticks that I cut in half (and made pointy!) with a couple of Xyron Adhesive Solutions 3/8" Dots.  Now I'm ready to spear some amazing game snacks!
The banner was really easy too! I took a football shape from the Silhouette store, and cut it in both kraft paper for the football, and white for the laces. I cut the title with cardstock, then offset the letters so that I could use a contrasting color with each letter. I then ran both the laces and the blue letters through my Xyron 3" Sticker Maker. I think that the 3" is my favorite Xyron tool.
Once the laces were attached to the footballs, and the blue letters were attached to the offset green ones, I needed to attach the title to each of the football pieces. Using the Xyron Adhesive Solutions 3/8" Dots, each of the letters was easily attached.
Once all of the letters were attached, I used a hole punch to create a place to use my grey twine and string up the banner.  
I'm kind of in love with the whole effect. Now all I need is some football snacks and one amazing game! GO HAWKS!
Supplies Used:
Xyron Adhesive Dots in 3/8", Xyron 1.5" Create-a-Sticker, Xyron 3" Sticker Maker, American Crafts Cardstock, Neenah Solar White Cover, Silhouette Cameo, Twinery Twine, printer, popsicle sticks. Pin It