It's almost the start of the school for me and my kiddos this year. One thing that I am accustomed to do is take the First Day of School Pictures of my children, but really wanted something for my students at school to also use. This, and a great Tuesday Morning find of a customizable clipboard gave me the idea of creating something decorative for my classroom, that could double as a sign for my kiddos to take their own First Day of School Pictures.
The papers and stickers are all from the Accolade Collection. I really wanted to focus on graduation, so used the mortarboard side of Accolade Four and the graduation phrases side of Accolade Five.
Each of the papers was carefully trimmed, then inked to look aged.
Since my school colors are black and gold, I used a simple satin ribbon with a button from my stash to finish this project. The best thing about the Accolade Collection is that it is neutral enough to go with any school colors. I could easily swap out the ribbon and button for any other color combination.
The printable is a free printable that I found online. I really liked the chalkboard effect and how it complemented the Accolade Collection.
Supplies Used:
Authentique Paper: Accolade Collection (Four, Five, Ten, Eleven, Details Stickers)
Other Supplies: DIY Clipboard, ribbon, Distress Ink (Frayed Burlap), button, Multi Media Matte (Ranger), printable (Designs by Nicolina)
Pin It
Showing posts with label photos. Show all posts
Friday, August 31, 2018
Friday, March 6, 2015
AUTHENTIQUE PAPER: Lucky Us Home Decor (Tutorial Linked)
Today on the Authentique Blog, I am sharing a tutorial using the Lucky Collection, my Xyron 9" Creative Station, and Silhouette Cameo. A special shoutout to Michelle Buck for her amazing photography of the girls in 2013.
Make sure that you stop on by the Authentique Blog and check out how to make your own home decor! Pin It
Monday, March 3, 2014
Gossamer Blue Life Pages (January 13-19)
Sometimes, weeks don't go the way that you plan...We watched the football game, got Guinness groomed, hung out a bit, and my friend figured out what colors she wants for her wedding. A little bit of illness (it's been a bit crazy as of late) and the week was done.
I'm not sure who makes that sweet kraft envelope, but I love it. My wonderful friend Brenda sent me a couple of them and I have been hoarding them for uses like this. Pin It
I really loved all of the Gossamer Blue printables this month, and used them throughout the layout quite a bit. Xyron's Adhesive Dots made them a breeze to apply.
And those sweet wood veneers by Elle's Studio are pretty fantastic. I'm not sure who makes that sweet kraft envelope, but I love it. My wonderful friend Brenda sent me a couple of them and I have been hoarding them for uses like this. Pin It
Wednesday, January 29, 2014
AUTHENTIQUE: Leaky Shed Chipboard!!
Hello! Today's post over at Authentique Paper uses some amazing chipboard by Leaky Shed Studios! This is a cute mini
book that I created using Leaky Shed's Camera Scrapbook Album. The great
part of this mini, is that all of the sections are separate, so that it
is really easy to cover with various papers and then glue down to
create some amazing dimension.
For the cover of this mini, I started with Expedition, then covered the middle sections with Touring. Lastly, I used the amazingly inky black paper from the back of the Voyage. I love how black that paper is. The large sticker is from the Details sheet and Elements stickers for the letters. I just love that this mini reminds me of the boat pictures inside by using the May Arts Cord to make it look like a life ring.
My second project is a sweet
Valentine heart decor. I found a paper heart, painted it with acrylic
paints, then added pieces from the Smitten Collection (Promise and Components papers) along with Leaky Shed's fantastic Watch Parts.
I really liked how the gears look like they are making the heart run.
Supplies Used:
Authentique Paper: Abroad Collection: Expedition, Touring, Voyage, Details, Elements; Smitten Collection: Promise, Components
Leaky Shed Studio: Camera Scrapbook Album, Watch Parts
Other Supplies: paper heart, acrylic
paint, Xyron High Tack Adhesive Dots, Xyron Maya Road Trinket Pins, May
Arts Ribbons and Cording
Pin It
Wednesday, November 13, 2013
We R Memory Keeper's Guest Designer
Hello! I am Heather Conklin. I'm super excited to share with you how much fun I had creating for We R today! I live in Washington State with my wonderful husband, two little girls, and not-so-miniature schnauzer. I teach high school art during the day, and craft on nights and weekends when the kiddos head to bed. I've been crafting since 2004, but have been creating my entire life. I was so happy to see the wonderful colors of the Harvest Collection as they went perfectly with our recent family photographs.
I love using all of my little bits and pieces for cards. For this card, I covered a card base using my Xyron 9" Creative Station, then used parts of the title strips from each paper sheet, and strips from the Fall Collage paper to add various patterns to the card base. Then, I simply added a ricrac ribbon and used dimensional adhesive with one of the Embossed Designer Stickers for a sentiment.
LAYOUT (2 PHOTO):
LAYOUT (2 PHOTO):

Cut down a sheet of Autumn Sprig to 11x11". Cut a 10x10" piece out of the middle out of a sheet of Pressed Flowers. Glue the 11x11" on top of the square frame of Pressed Flowers. Cut off a strip of the Fall Collage sheet and place it on the bottom third of your layout. Mat a 5x7" and wallet sized photo each with the leftover of the Pressed Flowers sheet. Place the 5x7" off center, and position the wallet in the photo's negative space.
Using a die cut machine, cut a doily out from the November Mist sheet and cut that in half. Position these pieces behind the photographs. Cut off the circle from Fall title, use some dimensional adhesive and place it over a few of the Embossed Designer Stickers. Use another of the Embossed Designer Stickers on the corner of your large photograph. Use Glossy Accents to highlight the white areas of the large orange flowers.
LAYOUT (1 PHOTO):

Cut down a sheet of Honeycomb to 11x11". Cut a dark brown piece of cardstock to 11.25x11.25". Glue the Honeycomb paper to the brown cardstock and then to a piece of vanilla cardstock. Cut a piece of Type Set to 8x10".
Corner round two alternate edges and glue down. Cut a piece of Pressed Flowers to 5x7" and corner round the opposite corners. Glue down, then using a contrasting marker, add faux stitching.
Mat your photo with a light cardstock, then take some of the leftover scraps of paper to make a collection of banners.
Place these under your photograph before you adhere it. Cut a circle, then layer a few of the Embossed Designer Stickers over it for your title. Die Cut a branch from cardstock, then add a few more of the Embossed Designer Stickers.
K-CUP HOLDER:

I cut the K Cup holder with my die cut machine using quality cardstock. Fold on all of the score lines, making a tube. The outermost section is the one next to the circles on the end. Adhere each edge flap as you go. When the K Cup holder is put together, add your decorative papers. For this one, I used rectangles of November Mist and a strip from the Fall Collage sheet. Make sure that you score your paper before attaching it to your holder. I then adhered circles of paper to each of the K Cups, then added a Embossed Designer Sticker to each of them.
Lastly, I tied the K Cups into the holder with some jute twine and tied a button to the bow.
*************************
Thanks for looking at today's post. Thank you again to We R Memory Keepers for having me guest design for you!!
Here is the link for the Silhouette File that I made for the K Cup holder LINK. Let me know if you make one, and link me up!
If you really like the photographs (and you are in the greater Seattle area!) make sure that you check out MG-B Photo or check out her Facebook Page. Michelle does some amazing work!
Pin It
Here is the link for the Silhouette File that I made for the K Cup holder LINK. Let me know if you make one, and link me up!
If you really like the photographs (and you are in the greater Seattle area!) make sure that you check out MG-B Photo or check out her Facebook Page. Michelle does some amazing work!
Monday, August 19, 2013
Photographs and Apps: How I Organize My Weekly Scrapbooking Part 2
Hello
again! I'm back with Part 2 of how I make my weekly (or sometimes
monthly when life becomes routine) layouts. Really, this is a collection
of cool apps and tricks to make life a little more simple, and ways in
which you can speed up the whole process. Especially when using your
stash.
I am in love with my iPhone. Seriously though, this little bugger is amazing. And all of the apps available?? LOVE!
Photo Taking Apps:
Hipstamatic
While I have Instagram... I really love my Hipstamatic app. No, it's not free, and yes, I've spent more than I'd like to admit on lenses, film upgrades, etc. But it's super fun. And you don't "have" to share your pics if you don't want. Often... I don't want to.
Photo Altering Apps:
A Beautiful Mess
This is really just an app to alter pics, use some filters, add some wording and images and have fun. Then you can Instagram or Facebook away and be done. I do however like this to alter some images, or add phrasing right when it happens. Sometimes the wording gets wonky, and its hard to straighten. I end up redoing it then, which is kind of frustrating.
Over
This app was free for iPhone users during the App Store's birthday week. So I didn't actually pay the $1.99 for the app. Totally worth it though. It's like A Beautiful Mess, but a little more user friendly. It has multiple artists' creating images and phrases for it, so you get more of a collection of varied items, rather than one point of view. They are pretty similar though. No filters on this app, and you don't have to make square photos, which I like.
The Essential Project Life App!:
PhotoDate
If you haven't heard of PhotoDate... You really need to look it up. If you are doing weekly, or scrapbooking in general, and use your phone... This is HUGE! It actually tells you when you took all of your pics on your phone. So simple, yet soooo important. I can hardly remember what day it is, and this little app does it for me. Want to be accurate with the date stamper? Now you can!
Apps to Make Life Easier:
PicFrame
Part of the frustration of scrapbooking weekly is the whole finding a photograph thing. It's kind of annoying how those little 3x4" pockets make printing a picture kind of impossible. This app is genius, as you can just combine photos together to either create a collage, stitch two pics together for a 4x6, or just print them on the cheap. The 99 cents for this app is amazingly inexpensive for the ease of use. There are some really great tutorials on how to use this app (my favorite at MySistersSuitcase), but it's pretty easy to use.
Costco is one of my favorite places to go. We seriously spend too much money there. But it's worth it when we normally buy the same things each month. And kids eat a lot. I don't know where they put it, but they eat. Anyway... I love Costco's print quality. I know it's not always the same quality as a "professional print lab"... But for the cost, they are really good. And the app is super easy to use. Plus, after using PicFrame, it's even cheaper!!
Walgreens
Personally, I am not a huge fan of Walgreen's photography labs. Mainly because they only print in glossy paper. And that bugs me. A lot. Probably because it's hard to photograph when the pics are on a layout. Totally a personal thing, everyone has their "thing"... Glossy paper is mine. The app is great though, and the service is really quick. When I really need a pic fast, I will send them here. Plus they have super late (some 24 hour) hours... Which is helpful. They are more costly than Costco's photo lab. Something to think about, but they do have coupons often. I always Google to see if there is an available coupon code to use before I finalize my order.
How It All Works Together:
Lastly, this is how I put it all together. I have scraps of paper about the size of business cards that I plan out my week. Arrows usually mean that I've moved something, or mixed up dates. Sometimes I draw silly things, scratch them out, add more. Often I totally change it all up. Any which way though, the sketches have helped me to stop printing 18 million photographs that I don't use. They aren't hugely expensive, but waste is waste. This has made me much more streamlined in my process.
Whew! Lot's of information overload. This week, I'll be posting the four weeks of layouts that I completed in about 24 hours using this process.
***Project Life is a system of memory keeping created by Becky Higgins. You can learn more here*** Pin It
Thursday, March 14, 2013
It's a Good Day (GB February)
The only problem (and it really isn't a problem!!) with using a kit service, is you do run out of full 12x12 sheets. My solution, (OH DARN!) is to go into my extensive stash and find something that both works with the kit, and the photo. In this case, I went searching through my Sassafras Lass papers. I found this great sheet of Simply Smitten, and checked the back for the most fantastic matching page. It even has journaling lines!!

I even was able to use up almost all of the Amy Tangerine letters that I got earlier! I love when a title makes me use a bunch of otherwise wasted letters.
What isn't shown, is the little kraft envelope behind the photo is actually filled with another photograph taken about seven months after the main image. It's of the two girls laying together on the bed. My hope for the two girls to get along is so far happening. I couldn't be happier! Pin It

I even was able to use up almost all of the Amy Tangerine letters that I got earlier! I love when a title makes me use a bunch of otherwise wasted letters.
What isn't shown, is the little kraft envelope behind the photo is actually filled with another photograph taken about seven months after the main image. It's of the two girls laying together on the bed. My hope for the two girls to get along is so far happening. I couldn't be happier! Pin It
Friday, December 21, 2012
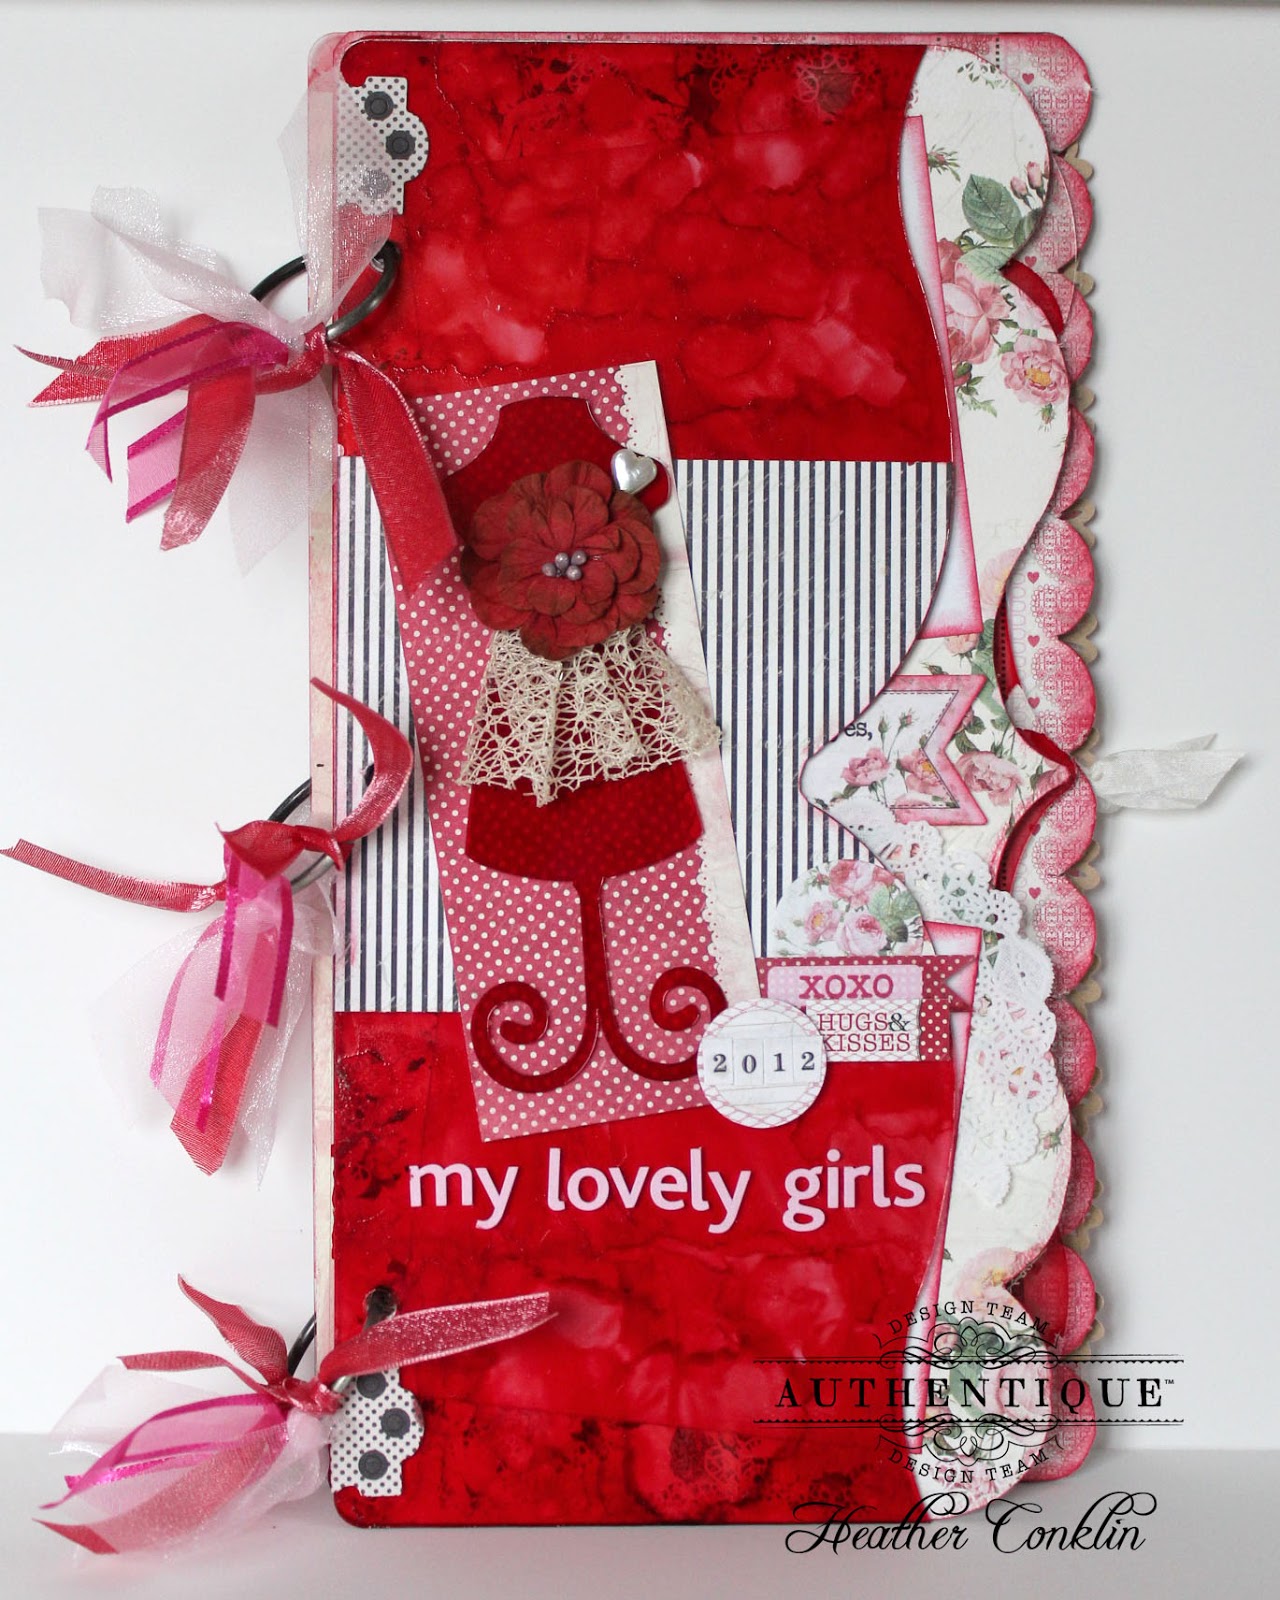
A Lovely Mini: AUTHENTIQUE PAPER
Come check out the fantastic mini that I made using Clear Scraps and Lovely papers from Authentique!!
Pin It
Pin It
Labels:
Altered,
altered project,
Authentique,
Authentique Paper,
children,
Clear Scraps,
Gift,
Imagine Crafts,
Lovely Collection,
May Arts,
Maya Road,
mini book,
Petaloo,
photos,
ribbon,
Valentine's
Wednesday, November 21, 2012
Month of Gratitude: Days 10-21
We moved over the weekend. We're about 80% moved in. There are still just a few boxes that haven't been unpacked. I'm a few days behind... Only a few.
Pin It
Pin It
Thursday, November 8, 2012
Subscribe to:
Posts (Atom)