Just wanted to let you know that the winner of the "Emily's Birthday Blog Hop" prize from me..
Is none other that, Crystal from Crystal's Creative Corner!! Go give her some bloggy love and follow her blog!
Congrats Crystal! I'll try to contact you sometime today for your information!!
Pin It
Wednesday, December 21, 2011
Saturday, December 17, 2011
Emily's "Back to the 80's" Birthday Blog Hop!
If you are here from Cristine's blog... You are in the right spot to help celebrate EMILY's 'BACK TO THE 80'S BIRTHDAY BLOG HOP'!!
If not, here's the lineup, and you can start at Emily's blog, and hop through the rest of the fun!!
Emily: http://www.createserendipity.net
I hope that you have had lots of fun on the way. Rather than making something 80's spectacular, I decided to create a page with a fun photo that has been staring at me for quite some time. This photo was special, as it was taken at my grandma's house when I was just a few years old. Notice the very cool Sesame Street sweatshirt, and my sweet kicks. Okay, so they were pretty lame... But for 1982, I was styling!!
Next door to my grandma's house was this wonderful and beautiful horse. The horse was so gentle, that I used to feed it hay and grass. Sometimes my grandma would give me apples or carrots. Best thing... it didn't like my little brother much, so the horse was all mine. Okay, so it was really my grandma's neighbor's horse... but at four years old, I had no clue.
Well, I hope you had fun with my little jaunt down memory lane!! Make a comment, and be in the running to win some fantastic blog candy from me!!!!
1980's blog candy: iRock, because who didn't want a Bedazzler in the '80's?? Rub-ons, the one scrappy item I actually owned when I was little. And '80's colored buttons!!
Happy birthday Emily!! May this year be full of memories, love and best wishes!!
Pin It
If not, here's the lineup, and you can start at Emily's blog, and hop through the rest of the fun!!
Emily: http://www.createserendipity.net
Lisa: http:// prettypaperprettyribbons.blogsp ot.com
Abby: http:// www.scrapbookaholicbyabby.com/
Candace: http:// www.papercraftsbycandace.blogsp ot.com
Nicole: http:// sweetstampshop.blogspot.com/
Julie Ranae: http:// juliesopenwindow.blogspot.com/
Stephanie: http:// www.sweetstephcardcreations.blo gspot.com/
Tanya: http:// nonnascraftcorner.blogspot.com/
Candace: http:// www.scrappin2littleprincesses.b logspot.com
Elizabeth: http://www.217creations.com
Angelica: http:// www.handmadebyangelica.com
Michelle: http:// www.scrappinwithmybug.com/
Erin: http://www.erinleecreative.com
Sarah: http://www.pinkcricut.com
Dawn: http:// www.designsthatdelight.com
Kathy: http:// kathyand3kids.blogspot.com
Jeannie: http:// polkacabana.wordpress.com/
Cristine: http:// onescrappynovice.blogspot.com/
Heather: http://goldiecar.blogspot.com/
Abby: http://
Candace: http://
Nicole: http://
Julie Ranae: http://
Stephanie: http://
Tanya: http://
Candace: http://
Elizabeth: http://www.217creations.com
Angelica: http://
Michelle: http://
Erin: http://www.erinleecreative.com
Sarah: http://www.pinkcricut.com
Dawn: http://
Kathy: http://
Jeannie: http://
Cristine: http://
Heather: http://goldiecar.blogspot.com/
I hope that you have had lots of fun on the way. Rather than making something 80's spectacular, I decided to create a page with a fun photo that has been staring at me for quite some time. This photo was special, as it was taken at my grandma's house when I was just a few years old. Notice the very cool Sesame Street sweatshirt, and my sweet kicks. Okay, so they were pretty lame... But for 1982, I was styling!!
Next door to my grandma's house was this wonderful and beautiful horse. The horse was so gentle, that I used to feed it hay and grass. Sometimes my grandma would give me apples or carrots. Best thing... it didn't like my little brother much, so the horse was all mine. Okay, so it was really my grandma's neighbor's horse... but at four years old, I had no clue.
Well, I hope you had fun with my little jaunt down memory lane!! Make a comment, and be in the running to win some fantastic blog candy from me!!!!
1980's blog candy: iRock, because who didn't want a Bedazzler in the '80's?? Rub-ons, the one scrappy item I actually owned when I was little. And '80's colored buttons!!
Happy birthday Emily!! May this year be full of memories, love and best wishes!!
Pin It
Friday, December 9, 2011
AUTHENTIQUE PAPER: A Gathering Mini Album
*****
Hello Authentique Fans, Heather here! I have a great little mini book for you today. I love mini's! They make the best little presents, especially for family that we don't get to see on a more regular basis. Plus, you can use up all those doubles of photos that you normally don't scrap with.Instead of going with a Christmas theme, I decided to use my Gathering Collection. The 6x6 pad made the perfect backgrounds for the mini pages, as all of the great Authentique patterns are miniscule.
I love how I was able to mix and match all the great pieces from the Gathering Collection to create this: various papers, Diction, Noteables, Icons, Tabloids, Petite Type (Orange & Aqua), Classic Type and Expressions.
The quotes in the Tabloids and Noteables make perfect mini-titles.
And I love how all the colors are just great for photos!
I even added some ribbon to help finalize the look.
Here are a few closeups. The quotes are just precious for family photos.
I already know who is getting this mini, but I'm inspired to possibly make a few more over the weekend! I hope that you have fun with your Authentique this weekend too!!
Supplies Used:
Authentique Gathering Collection: 6x6 Paper Bundle, Icons, Tabloids, Noteables, Expressions, Petite Type (Orange & Aqua), Classic Type
Additional Supplies: AC This to That, May Arts ribbon (blue), floral ribbon (coral), Bind-it-All system and binding
Pin It
Saturday, December 3, 2011
My First Ever Published Piece... And a Bit of Truth
The past few weeks, I have been creatively drained. It's not often that I really want to admit to such truths... But I really haven't been too into crafting. Or reading, cleaning, or generally doing much of anything. I've even been lazy on Pinterest.
I digress however, because this week I did have some amazing news! I was contacted in October/November about a card that I made during World Cardmaking Day. I looked on the Scrapbook & Cards Today blog and saw a cute Becky Fleck sketch that was for one of their "calls". So, I created a cute little Christmas card using the ever-so-fantastic Authentique Wonder papers.
Well, Becky Fleck herself (I KNOW!) emailed me, and asked if I wanted to be published... UM, YES!
Long story short, the magazine, Scrapbook & Cards Today came out on December 2nd. And my card got a page! WOOT!
My card is located on page 46. I know you want to go and check it out!!!
My mojo is slowly coming back... I'll be back to normal soon <3 Pin It
I digress however, because this week I did have some amazing news! I was contacted in October/November about a card that I made during World Cardmaking Day. I looked on the Scrapbook & Cards Today blog and saw a cute Becky Fleck sketch that was for one of their "calls". So, I created a cute little Christmas card using the ever-so-fantastic Authentique Wonder papers.
Well, Becky Fleck herself (I KNOW!) emailed me, and asked if I wanted to be published... UM, YES!
Long story short, the magazine, Scrapbook & Cards Today came out on December 2nd. And my card got a page! WOOT!
My card is located on page 46. I know you want to go and check it out!!!
My mojo is slowly coming back... I'll be back to normal soon <3 Pin It
Friday, November 25, 2011
AUTHENIQUE PAPER: Putting a Bird on Free Bird
From the Authentique Blog:
*****
Hello folks!! Heather here. I hope that all of your Thanksgiving feasts were wonderful, and that you were able to spend time with loved ones. Today for you, I have a nifty piece of decor that you too could whip up before the holidays!
Samantha showed me a fantastic pin over at Pinterest, and I was inspired to use the Free Bird Series to craft something similar. I even drew a lovely little chickadee to place on it!
I chose to use Warmth for the wreath, as I felt that it reminded me of all of winter. It does have some lovely colors and patterns.
I didn't have a little chickadee, so I actually drew one up using my scrapbooking pens and a little bit of chalk ink. Yup... the yellow is chalk ink!
The wreath itself is simply concentric circles of cones of paper. I just cut the Free Bird pages in half using decorative scissors, then trimmed off one of the 3" sides with decorative scissors as well. Roll the paper into cones, then attach the trimmed edge to the cone with a glue dot.
To attach the cones to the wreath, each cone is pinned in place, then hot glued. I haven't quite made up my mind whether or not I want to replace the drawing with a little faux bird or not yet. At the moment, I rather like him.
I hope that you enjoyed my take on a fun decor project. Just another way to use those fantastic Free Bird papers!! Have a great start to the holiday season!!
Supplies Used:
Authentique Free Bird Series: Warmth FBS 129, 130, 131 & 132
Additional Supplies: wreath form, American Crafts Memory Markers in Charcoal and Black, AC ribbon, AC white cardstock, Colorbox Chalk ink in Yellow Cadmium, stick
Pin It
Monday, November 14, 2011
AUTHENTIQUE BLOG: Wooden Christmas Ornaments with Free Bird!
From the AUTHENTIQUE PAPER BLOG:
*****
Hello Authentique fans, it's Heather!
I have a really inexpensive idea for either a small decor item, or
possibly a beautiful, and toddler-proof Christmas ornament. My little
girl found this on an end-cap of one of the large chain craft stores. At
first, she grabbed the more expensive birdhouse, but I was able to
trade her for this smaller (and only $1!) one instead. She was happy
throughout the rest of the shopping trip, and I wasn't out a lot of
money.
While
this step is completely optional, painting the pine birdhouse can tie
all of the colors together. I chose black, and painted the inside as
well. Since it was pine, the paint dries very quickly. This is seriously the hardest step... Take a piece of copy paper, to figure out where the posts are. In this case, I was able to use an office hole puncher in order to slide the paper over the roosts. If you are using a larger birdhouse, you may want to cut the holes out with fine-point scissors.
I then grabbed my first piece of Free Bird ("Delight" FBS 111). Rather than measuring and cutting out, I was able to fit most of the pieces in without spending too much time measuring. In this case, the eave of the roof was 90 degrees, and I was able to use the corner of the paper as my angle. I then just creased the edges and cut them off so that the piece fit properly.
I had to use an X-Acto knife to slice the very bottom from the paper. Then, I felt for the holes in the birdhouse, and used the back of my X-Acto knife to slightly push in the edges of the entrances.
To cut the holes, I used a rotary nail file to "sand" them off. You could also use a wood file or even a thin nail file.
Mod-Podge the wood base, then the paper to make it all stick! I found out that the more Mod-Podge you use, the better it all sticks! Plus, it dries clear... So even if it looks like it's all weird... Wait a few hours.
Repeat the same steps on the other sides of the birdhouse. I ended up using just one sheet of Free Bird for all of the sides! I then added a thin strip of a different paper ("Delight" FBS 112) for the bottom edge of the birdhouse. Rather than piece the paper, I diagonally cut a strip from corner to corner. I punched only part of a hole in the top, so that the roost would fit around the edge. Then, Mod-Podge'd it all down.For the roof, I used half of a piece of "Delight" FBS 109. One side of the roof was simple, and just needed an edge punch to add some extra dimension to the roof. The other side needed to have some of the roof notched in with a hole punch so that it fit the rope. I just played with the amount I cut out until it fit right.
For the last detail, I added small strips of the same paper (FBS 109) to the front and back of the roof eaves.
When you have finished with your decoration, Mod-Podge the entire thing once more. Let it dry completely for a few hours.
I haven't shown this to my little toddler yet, but I know that she is going to love it. Best part, the total bill on this project (if you already have Mod-Podge and paint) is under $3!! Even if it doesn't last toddler hands... I can make another one for just a few dollars! Pin It
Saturday, November 12, 2011
Authentique and Twinery Blog Hop!!!
HELLO AUTHENTIQUE AND TWINERY HOPPERS!!
If you came here from Hera Frei's site, you are in the right spot! If you just started here, make sure that you start at the beginning with Authentique Paper, to enjoy all of the fun!!
Authentique Paper
Tifany DeGough
Julie Ranae Murray
Natalie Dever
Stephanie Johnson
Emily Lanham
Hera Frei
Heather Conklin <-----YOU ARE HERE
Deena Neimat
Janeen Shember
Ivona Foster
The Twinery
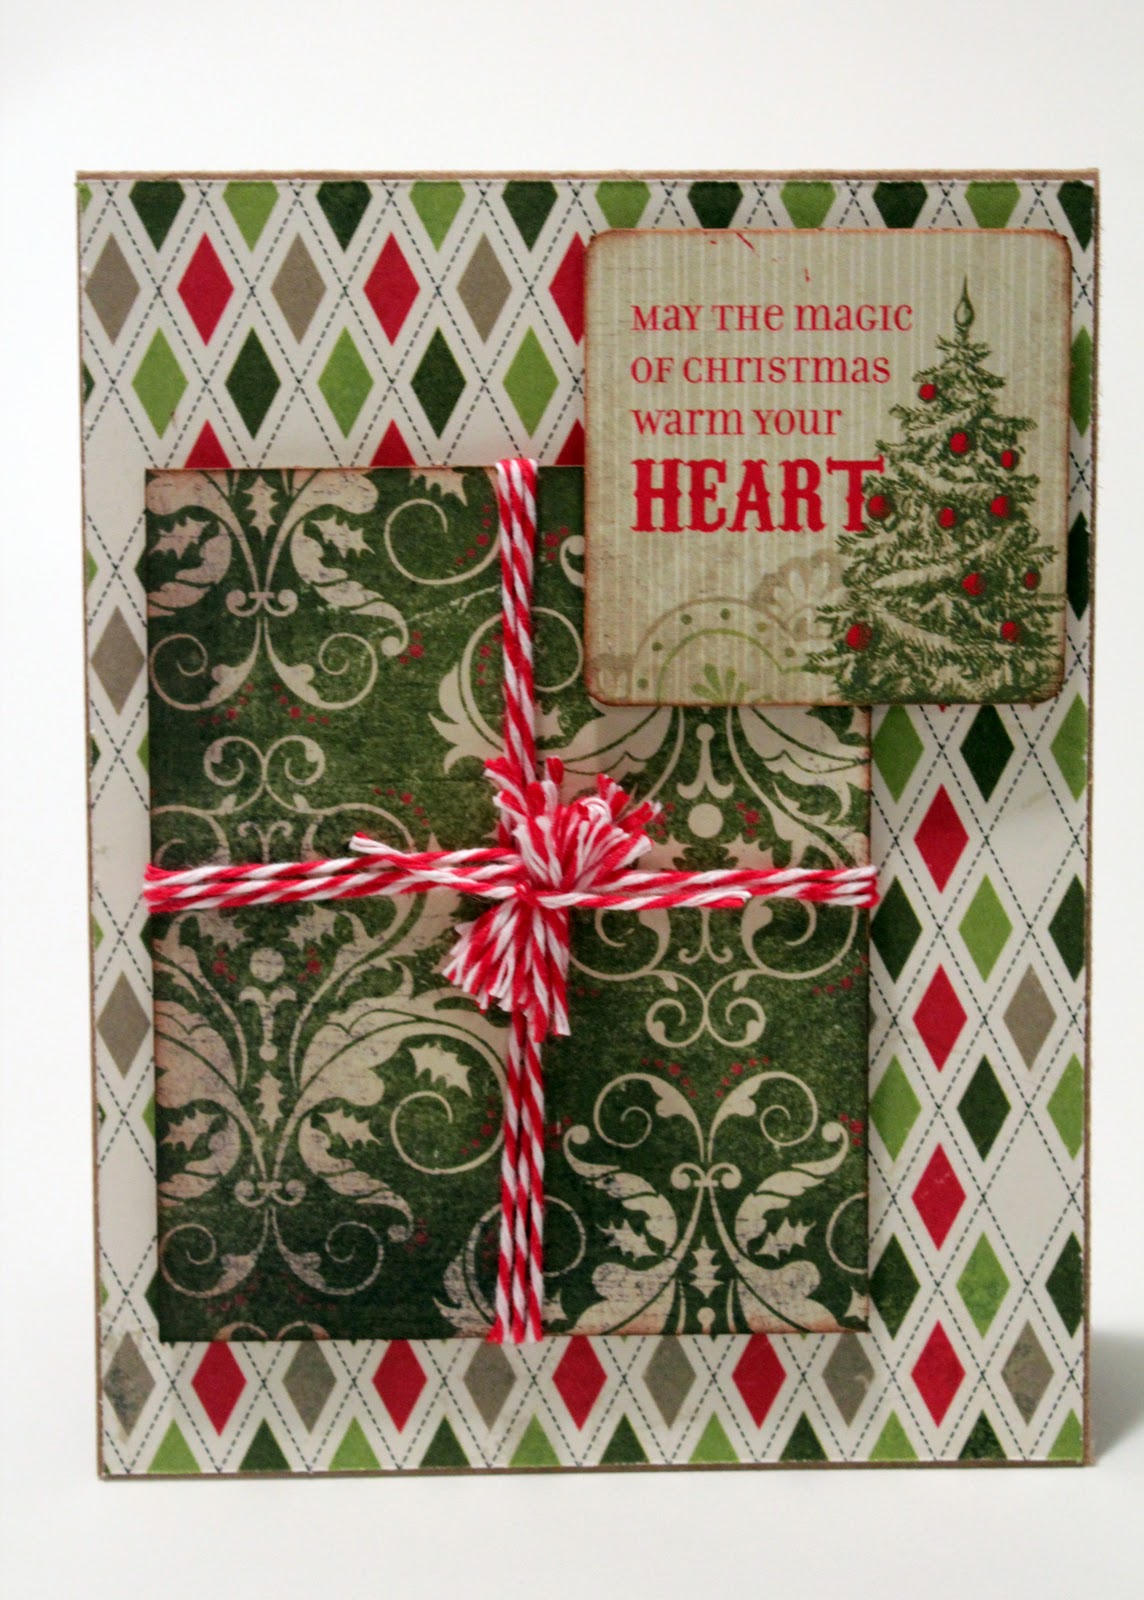
For my first two cards, I kept a Christmas theme! On the first one, I decided to keep a simple wrapped present as my main theme. I just love how the Twinery twine can transform anything very simply.
For the second card, I decided to use various colors of twine in different ways. I love how I was able to braid the twine, so that I could add a cute scarf to the snowman. I then stitched the tree decorations, and tied little bows for each present.
For the last card, I used my new favorite Authentique line... GATHERING! I used my diecut machine to cut out a heart, and then placed a smaller heart in the center, tying twine around the smaller heart. This is a really simple card, but I really like it. I added a little bit of chalk ink for detail, a Noteable message and a button.
I hope you enjoyed my cards today! Make sure that you continue the hop at Deena Neimat's website!! Have fun!
If you came here from Hera Frei's site, you are in the right spot! If you just started here, make sure that you start at the beginning with Authentique Paper, to enjoy all of the fun!!
Authentique Paper
Tifany DeGough
Julie Ranae Murray
Natalie Dever
Stephanie Johnson
Emily Lanham
Hera Frei
Heather Conklin <-----YOU ARE HERE
Deena Neimat
Janeen Shember
Ivona Foster
The Twinery
For my first two cards, I kept a Christmas theme! On the first one, I decided to keep a simple wrapped present as my main theme. I just love how the Twinery twine can transform anything very simply.
For the second card, I decided to use various colors of twine in different ways. I love how I was able to braid the twine, so that I could add a cute scarf to the snowman. I then stitched the tree decorations, and tied little bows for each present.
For the last card, I used my new favorite Authentique line... GATHERING! I used my diecut machine to cut out a heart, and then placed a smaller heart in the center, tying twine around the smaller heart. This is a really simple card, but I really like it. I added a little bit of chalk ink for detail, a Noteable message and a button.
I hope you enjoyed my cards today! Make sure that you continue the hop at Deena Neimat's website!! Have fun!
Supplies:
AUTHENTIQUE
patterned papers and supplies: Wonder-Awe, Anticipation, Petite Type Circle, and Icons; Gathering-Together & Flourish, Noteables
Other Supplies: Twinery twine in Maraschino, Charcoal, Buttercream, Lemondrop and Cappuccino, Colorbox Chalk Ink, button, Stickles
Pin It
Subscribe to:
Posts (Atom)