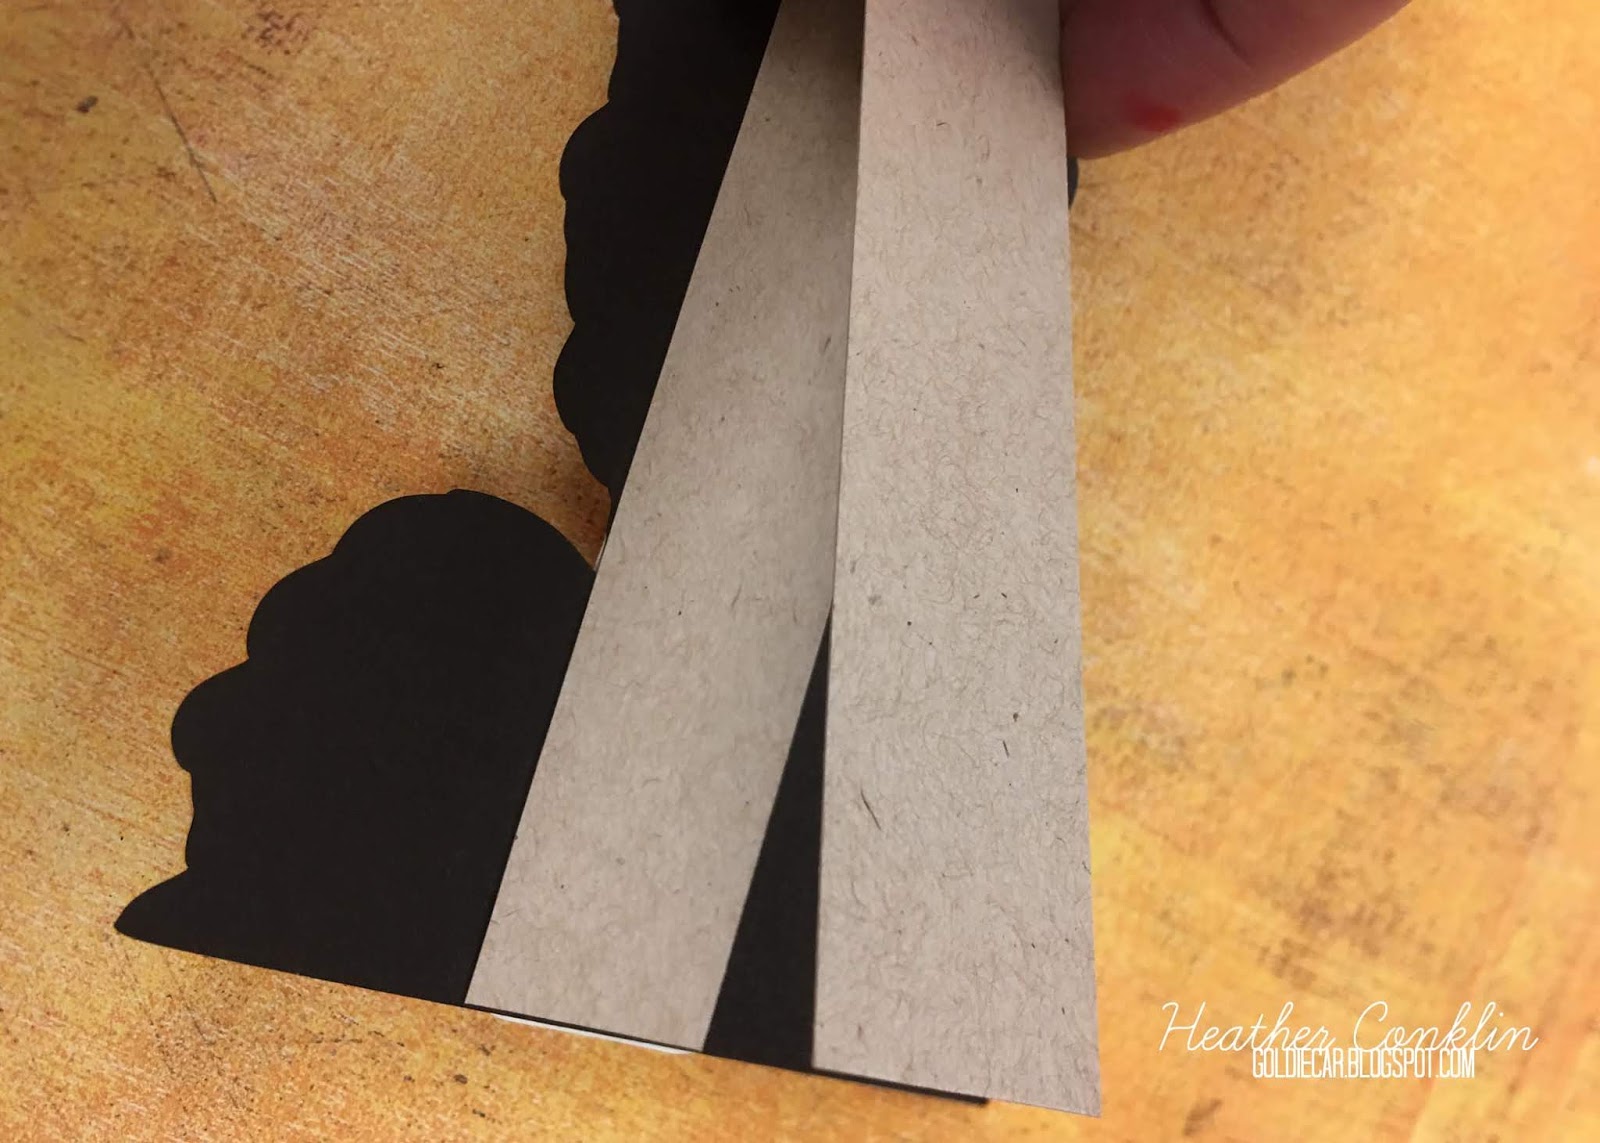
To make the back of this card, I just measured the thinnest part of the llama, and doubled some cardstock. The cut image of the llama hides the tiniest of card bases. This could also double as a stand if your recipient wanted to use this as a decor piece.
Supplies Used: Silhouette Cut File, Authentique Paper (Artisan linen cardstocks, Micro Basics)
Pin It
Monday, May 21, 2018
Paper Girls Challenge #152 - Shapes
I LOVED this challenge from the Paper Girls Challenge Blog! I wanted to use a fun cut file, or cool shaped paper to create something. Once I saw this llama card, I knew I just HAD to use the llama to make my own shaped creation!
Monday, April 2, 2018
Paper Girls Challenge #149: Masculine Birthday
Hello! Today's Paper Girls Challenge is all about Masculine Birthday cards and projects. Not surprising to many, making masculine cards is sometimes a challenge. Since I have two little girls, a TON of my paper and embellishments are pretty girly. For this challenge, I wanted to challenge myself by NOT using patterned paper, and instead use a few things that would imply masculinity, without be overtly obvious. My card today I think was a good mix of color and small details that create a pretty neat project.
I started with a simple kraft cardstock background and crackled, colored cardstock. I have had the Tim Holtz Soda Bottle Blueprint Rubber Stamp (got on clearance at Hobby Lobby) for about a year now, and this was the perfect time to start using it. I used a Memento Dew Drop in Nautical Blue for the ink, then colored the star with a silver colored pencil. The last few details were a Stampin Up stamp from a long time ago with some silver embossing powder, a few enamel shapes and a touch of Wink of Stella glitter pen in a few areas.
Items Used:
kraft cardstock (Neenah cardstock), blue cardstock (Tim Holtz Distress Core'dinations), Tim Holtz Soda Bottle Blueprint Rubber Stamp, Memento Dew Drop (Nautical Blue), Prismacolor colored pencil (Silver), Wink of Stella, enamel shapes Pin It
I started with a simple kraft cardstock background and crackled, colored cardstock. I have had the Tim Holtz Soda Bottle Blueprint Rubber Stamp (got on clearance at Hobby Lobby) for about a year now, and this was the perfect time to start using it. I used a Memento Dew Drop in Nautical Blue for the ink, then colored the star with a silver colored pencil. The last few details were a Stampin Up stamp from a long time ago with some silver embossing powder, a few enamel shapes and a touch of Wink of Stella glitter pen in a few areas.
Items Used:
kraft cardstock (Neenah cardstock), blue cardstock (Tim Holtz Distress Core'dinations), Tim Holtz Soda Bottle Blueprint Rubber Stamp, Memento Dew Drop (Nautical Blue), Prismacolor colored pencil (Silver), Wink of Stella, enamel shapes Pin It
Monday, March 19, 2018
Paper Girls Challenge #148: Embossing
The Paper Girls Challenge Blog is all about embossing this week. Dry embossing, heat embossing, you name it, it will work. For today's challenge, I finally got out my Topography stamp set from Neat and Tangled. I loved the possibilities with this, especially with my watercolors. The watercolors are the wonderfully opaque Kuretake Gansai Tambi paints. They are simply delicious.
I love the sentiment. And the melon color of the cardstock picks up the very color from in the painted card. Make sure to check out the challenge, and add your own project! Pin It
Monday, March 5, 2018
PAPER GIRLS CHALLENGE BLOG: Challenge #147 - Travel
Good Morning! Today I am sharing with you a fantastic card that I created with some older products. I love using materials I have on hand, as getting to the craft store seems to be more difficult lately with a crazy schedule and so much to do. For today's Paper Girls Challenge Blog project, we are focusing on Travel. I chose to take this in the direction of a travel card using Authentique's Explore Collection and Lawn Fawn stamps and matching dies, colored with Chameleon Markers.
I loved the little pops of violet throughout the card. I purchased the stamps forever ago, but only got the dies fairly recently. This was a great way to reuse those items I got so long ago. The Diamond Press made the small dies so easy to cut out. Supplies Used:
Authentique Paper (Explore Collection kit: Ten, Eleven, Details, Components die cuts), Lawn Fawn: (Happy Trails stamps and Happy Trails Lawn Cuts dies), Chameleon Pens, Versafine ink, Neenah Solar White paper, Diamond Press die cut machine Pin It
Labels:
Authentique,
Authentique Paper,
Card,
card making,
chameleon pens,
coloring,
Diamond Press,
die cuts,
Lawn Fawn,
markers,
paper girls,
Paper Girls Challenge Blog,
stamp,
travel
Monday, February 19, 2018
PAPER GIRLS CHALLENGE BLOG: Challenge #146 - Black & White
Today on the Paper Girls Challenge Blog is our fantastic challenge #146, using only Black and White. I adore challenges. I love re-imagining how I can use up my materials in different ways to create fun new things. I'm often inspired by techniques that I see online, especially YouTube. My favorites are Kristina Werner and Jennifer McQuire. Both ladies are uber-talented, and have so many ideas.
I was watching one of Kristina's videos, when I realized I had everything I needed to recreate my version of her project using supplies I had on hand.
Concord and 9th is one of my current obsessions. I adore almost everything they come up with, and I'm pretty picky, so that's saying a lot. One of my favorite stamps that I love trying to play with in different ways is their Hello Lovely stamp set. I really love that depending on how you use it, it takes on completely new levels of complexity.
This is pretty simple, and came together rather quickly. Use an embossing buddy, or some sort of prep powder for this, as you really do not want any stray white powder on the black paper. Then with Versamark and your favorite white embossing powder, heat emboss the image. Then use the white gouache paint to create areas of lights and darks in the embossed image. Let dry, and finish with a sentiment. That's it!
Check out the blog for our PG Challenge #146 - Black and White and share with us your new creation! We have quarterly prizes and would love to see you create with us.
After creating this, I also realized that it would also fit the Concord and 9th challenge blog, Where Creativity Meets C9 challenge for Watercolors. Enjoy!
Pin It
I was watching one of Kristina's videos, when I realized I had everything I needed to recreate my version of her project using supplies I had on hand.
Concord and 9th is one of my current obsessions. I adore almost everything they come up with, and I'm pretty picky, so that's saying a lot. One of my favorite stamps that I love trying to play with in different ways is their Hello Lovely stamp set. I really love that depending on how you use it, it takes on completely new levels of complexity.
This is pretty simple, and came together rather quickly. Use an embossing buddy, or some sort of prep powder for this, as you really do not want any stray white powder on the black paper. Then with Versamark and your favorite white embossing powder, heat emboss the image. Then use the white gouache paint to create areas of lights and darks in the embossed image. Let dry, and finish with a sentiment. That's it!
Check out the blog for our PG Challenge #146 - Black and White and share with us your new creation! We have quarterly prizes and would love to see you create with us.
* * * * * *
After creating this, I also realized that it would also fit the Concord and 9th challenge blog, Where Creativity Meets C9 challenge for Watercolors. Enjoy!
Pin It
Labels:
black cardstock,
Card,
card making,
card set,
challenge,
challenges,
color challenge,
concord and 9th,
embossing,
Heather Conklin,
paint,
paper girls,
Paper Girls Challenge Blog,
stamp,
watercolor,
WCMC9
Tuesday, February 6, 2018
PAPER GIRLS CHALLENGE BLOG: Happy 6th Anniversary!
Hello! It's a Happy Anniversary to the Paper Girls Challenge Blog! They are 6 years old today. Which is amazingly exciting! They are a bunch of great ladies who are pretty darn talented. Today's challenge is all about 6's.
I ended up creating a rainbow card with 6 washi tapes and 6 enamel dots. I love how clean and simple it is. Pin It
Wednesday, January 31, 2018
AUTHENTIQUE PAPER: Party's that POP! with Authentique
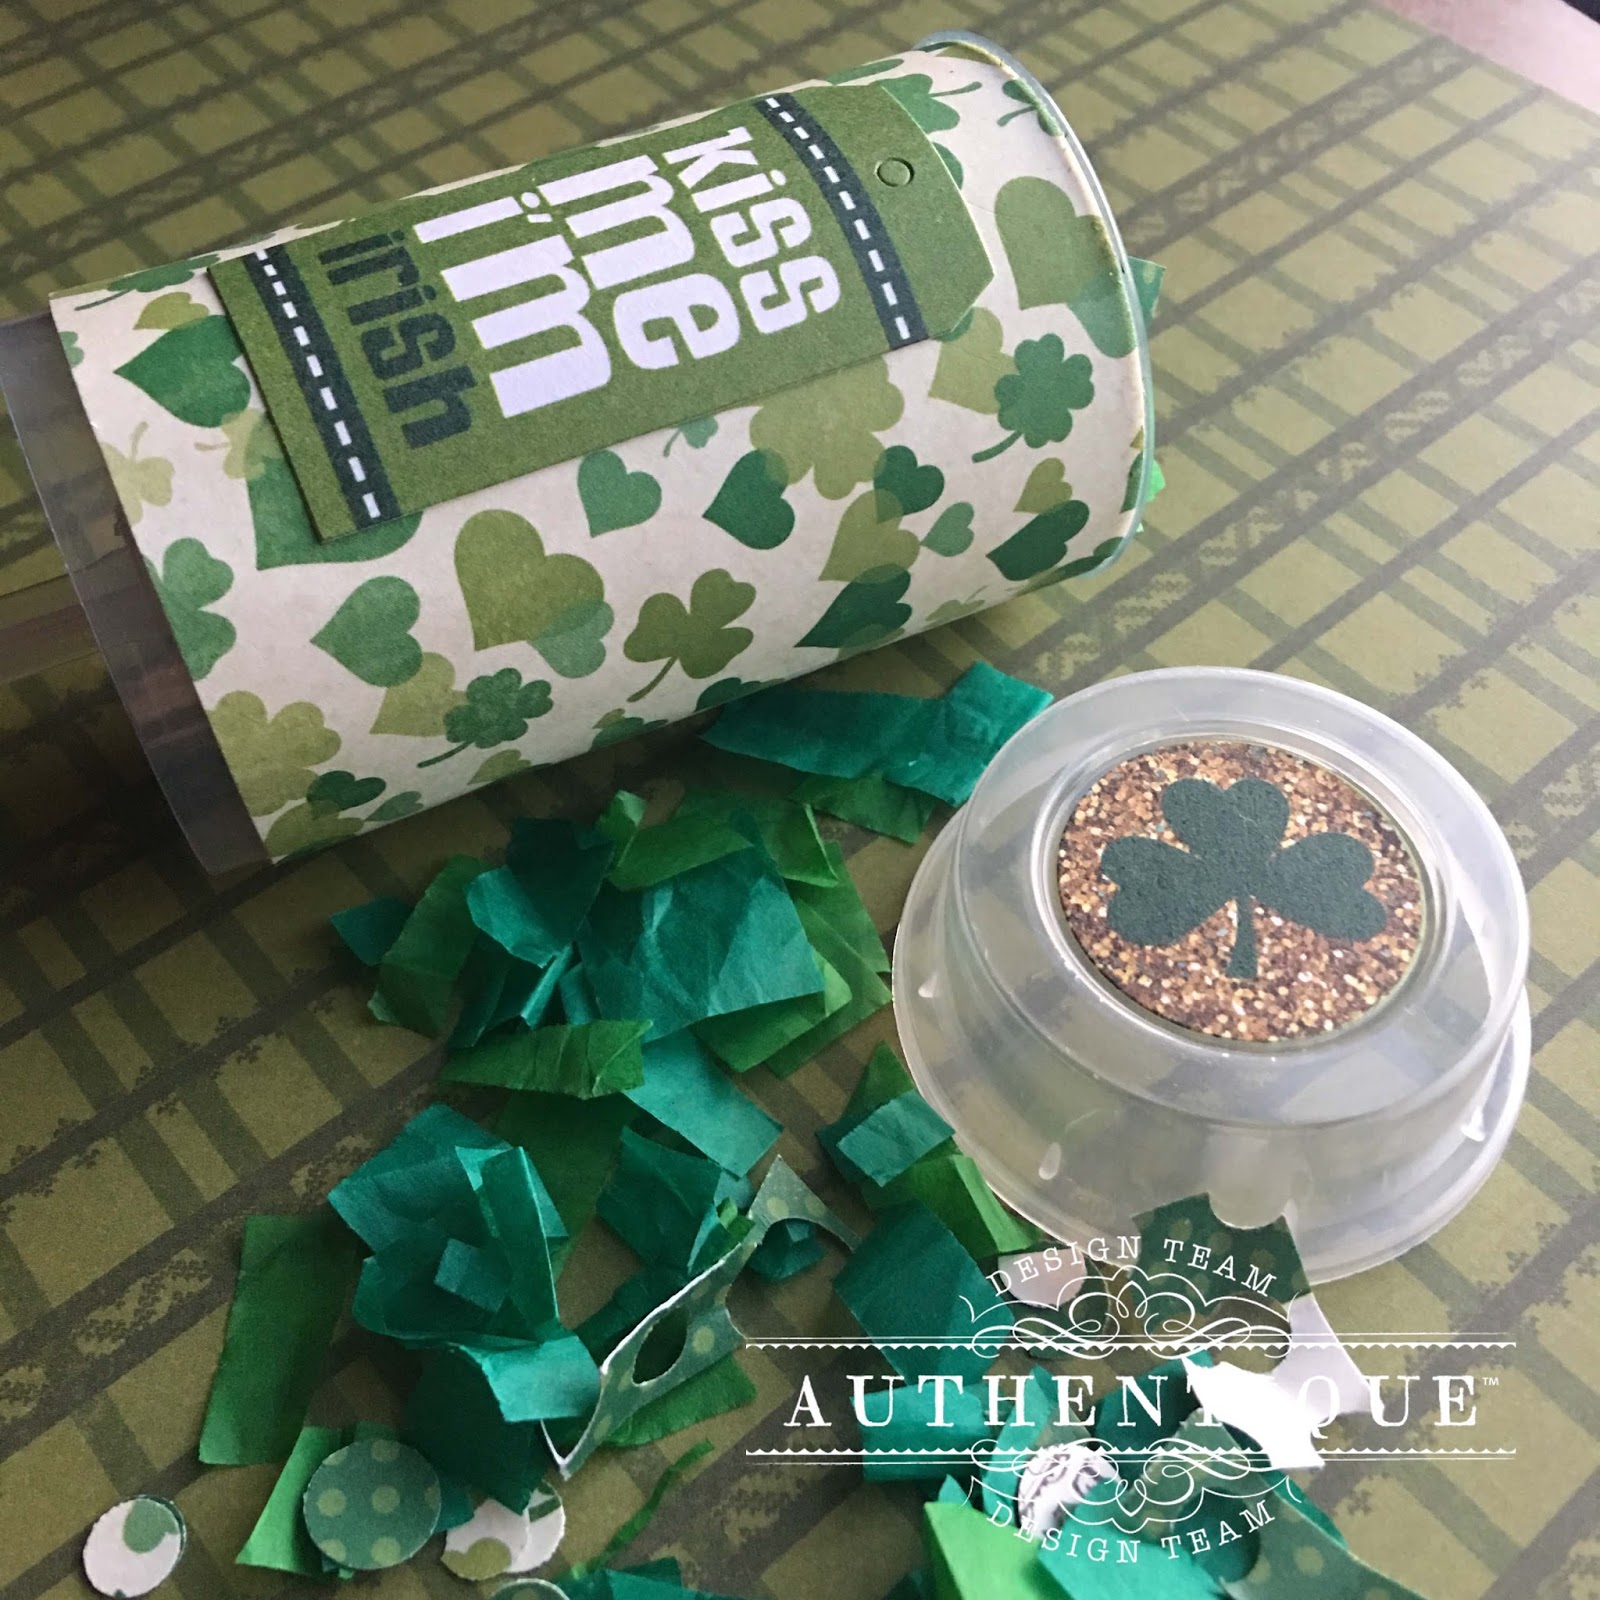
Hello! I wanted to share a fun idea that would be easily repeatable for any holiday or occasion. I created two for Valentine's and St. Patrick's Day using our Lovestruck and Shamrock collections, but depending on what paper collection you use, you could also use them for weddings, showers, or my favorite, birthdays.
I started with a set of Cake Pop / Push Pop plastic holders. I found mine on Amazon, but there are tons out there at other stores.
I looked for a set that was able to have a lid that could be resealable.
Then I created all kinds of confetti. I punched matching paper until the paper couldn't take it anymore, then I cut those punched areas into strips and added those to my pile. Then, I cut mini strips of colored tissue paper, then cut those strips down to mini pieces.
It's not horribly time consuming, but it will take more "fluff" than you originally think.
Once all of your confetti and fluff is all cut and punched, put it aside to decorate your plastic holders. I found that the best glue for this was dry adhesive, so got out my Xyron 3" sticker maker. Any strong, non-liquid adhesive (edge-to-edge, strong runner, or strip adhesive) would work best since you will be adhering paper to plastic.
I cut my paper down to 3x8", then added adhesive. It was enough paper to wrap around the plastic holder, with a little bit of extra coverage in the back to stick the paper to itself. Once you add your paper, decorate with stickers, firmly adhering those to the paper. Then stuff those plastic holders and stick on the lid!
Once your confetti poppers are all put together, you do need a bit of force to make them pop open, but the results are worth it!
I would probably use these for indoor use, as you could easily clean them up.
Supplies Used:
Authentique Collections: Lovestruck Collection (Two, Details stickers), Shamrock (Four),
Pin It
Authentique Collections: Lovestruck Collection (Two, Details stickers), Shamrock (Four),
Subscribe to:
Posts (Atom)